Shop / Series Magic solutionsSeries Magic solutions
Here, you’ll find tried and tested solutions to recurring Series problems. Some are based on our R&D and are designed, fabricated, modified or restored in our workshop. Others are unmodified parts that qualify as solutions because of their exceptional quality and problem-solving value.
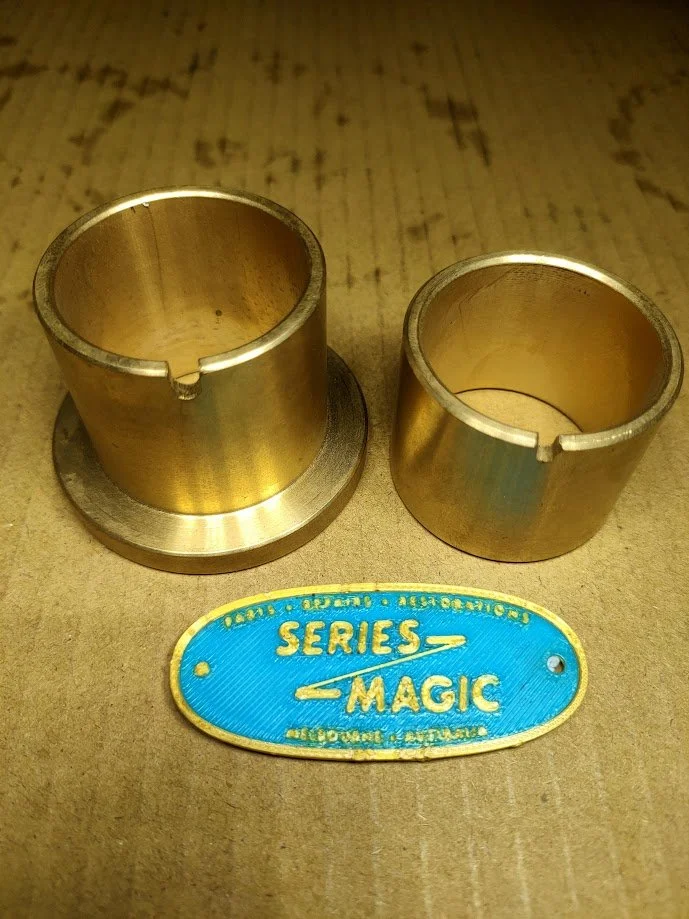
Part numbers: FRC4076 and FRC4077
A dimensionally accurate mainshaft 2nd gear and mainshaft 3rd gear split bush set for a standard (LT76) Land Rover Series 3 gearbox, made with the right bronze alloy (not too soft, not too brittle).
These split bush sets can also be fitted to Series 1 gearboxes from serial numbers 26110020 (RHD) and 26137678 (LHD); and to all Series 2 and Series 2a gearboxes. Land Rover introduced the split bush during Series 3 production as a belated upgrade: the one-piece bush it superseded often breaks at the shoulder. We only fit and recommend two-piece bushes, and only these particular two-piece bushes.
The problem
Genuine bushes (unobtainable) were dimensionally accurate (with rare exceptions) and were made of the right kind of bronze alloy. Typical aftermarket bushes are made of a more brittle alloy and are dimensionally inaccurate, usually in more than one way. These inaccuracies can sometimes be rectified at the bench or on a lathe, but we shouldn’t have to do this. Over the years, countless brand new bushes went straight into our workshop’s scrap metal bin after taking them out of the box and measuring them (it wasn't worth pursuing the warranty claims).
Our solution
We use and recommend these particular FRC4077 and FRC4077 bushes. They're based on Genuine samples, they’re dimensionally accurate and are made out of the right kind of the bronze alloy: not too soft, not too brittle.
The details
Typical aftermarket bushes haze zero allowance for gear endfloat. The bushes we use and recommend have a generous allowance for setting up the correct endfloat. We used to have to ream bushes so they’d slide over the mainshaft, and/or linish them so the gear would spin smoothly on the bush rather than grabbing due to insufficient radial clearance (which can cause the gear to seize on the bush in service). Now, with these dimensionally accurate bushes, we rarely need to make such modifications. If we do, it’s because a gear or shaft is out of spec, not the bush. But for your peace of mind—and ours—we always check each bush prior to shipment for fit, and gear endfloat, on Genuine gears and shafts.
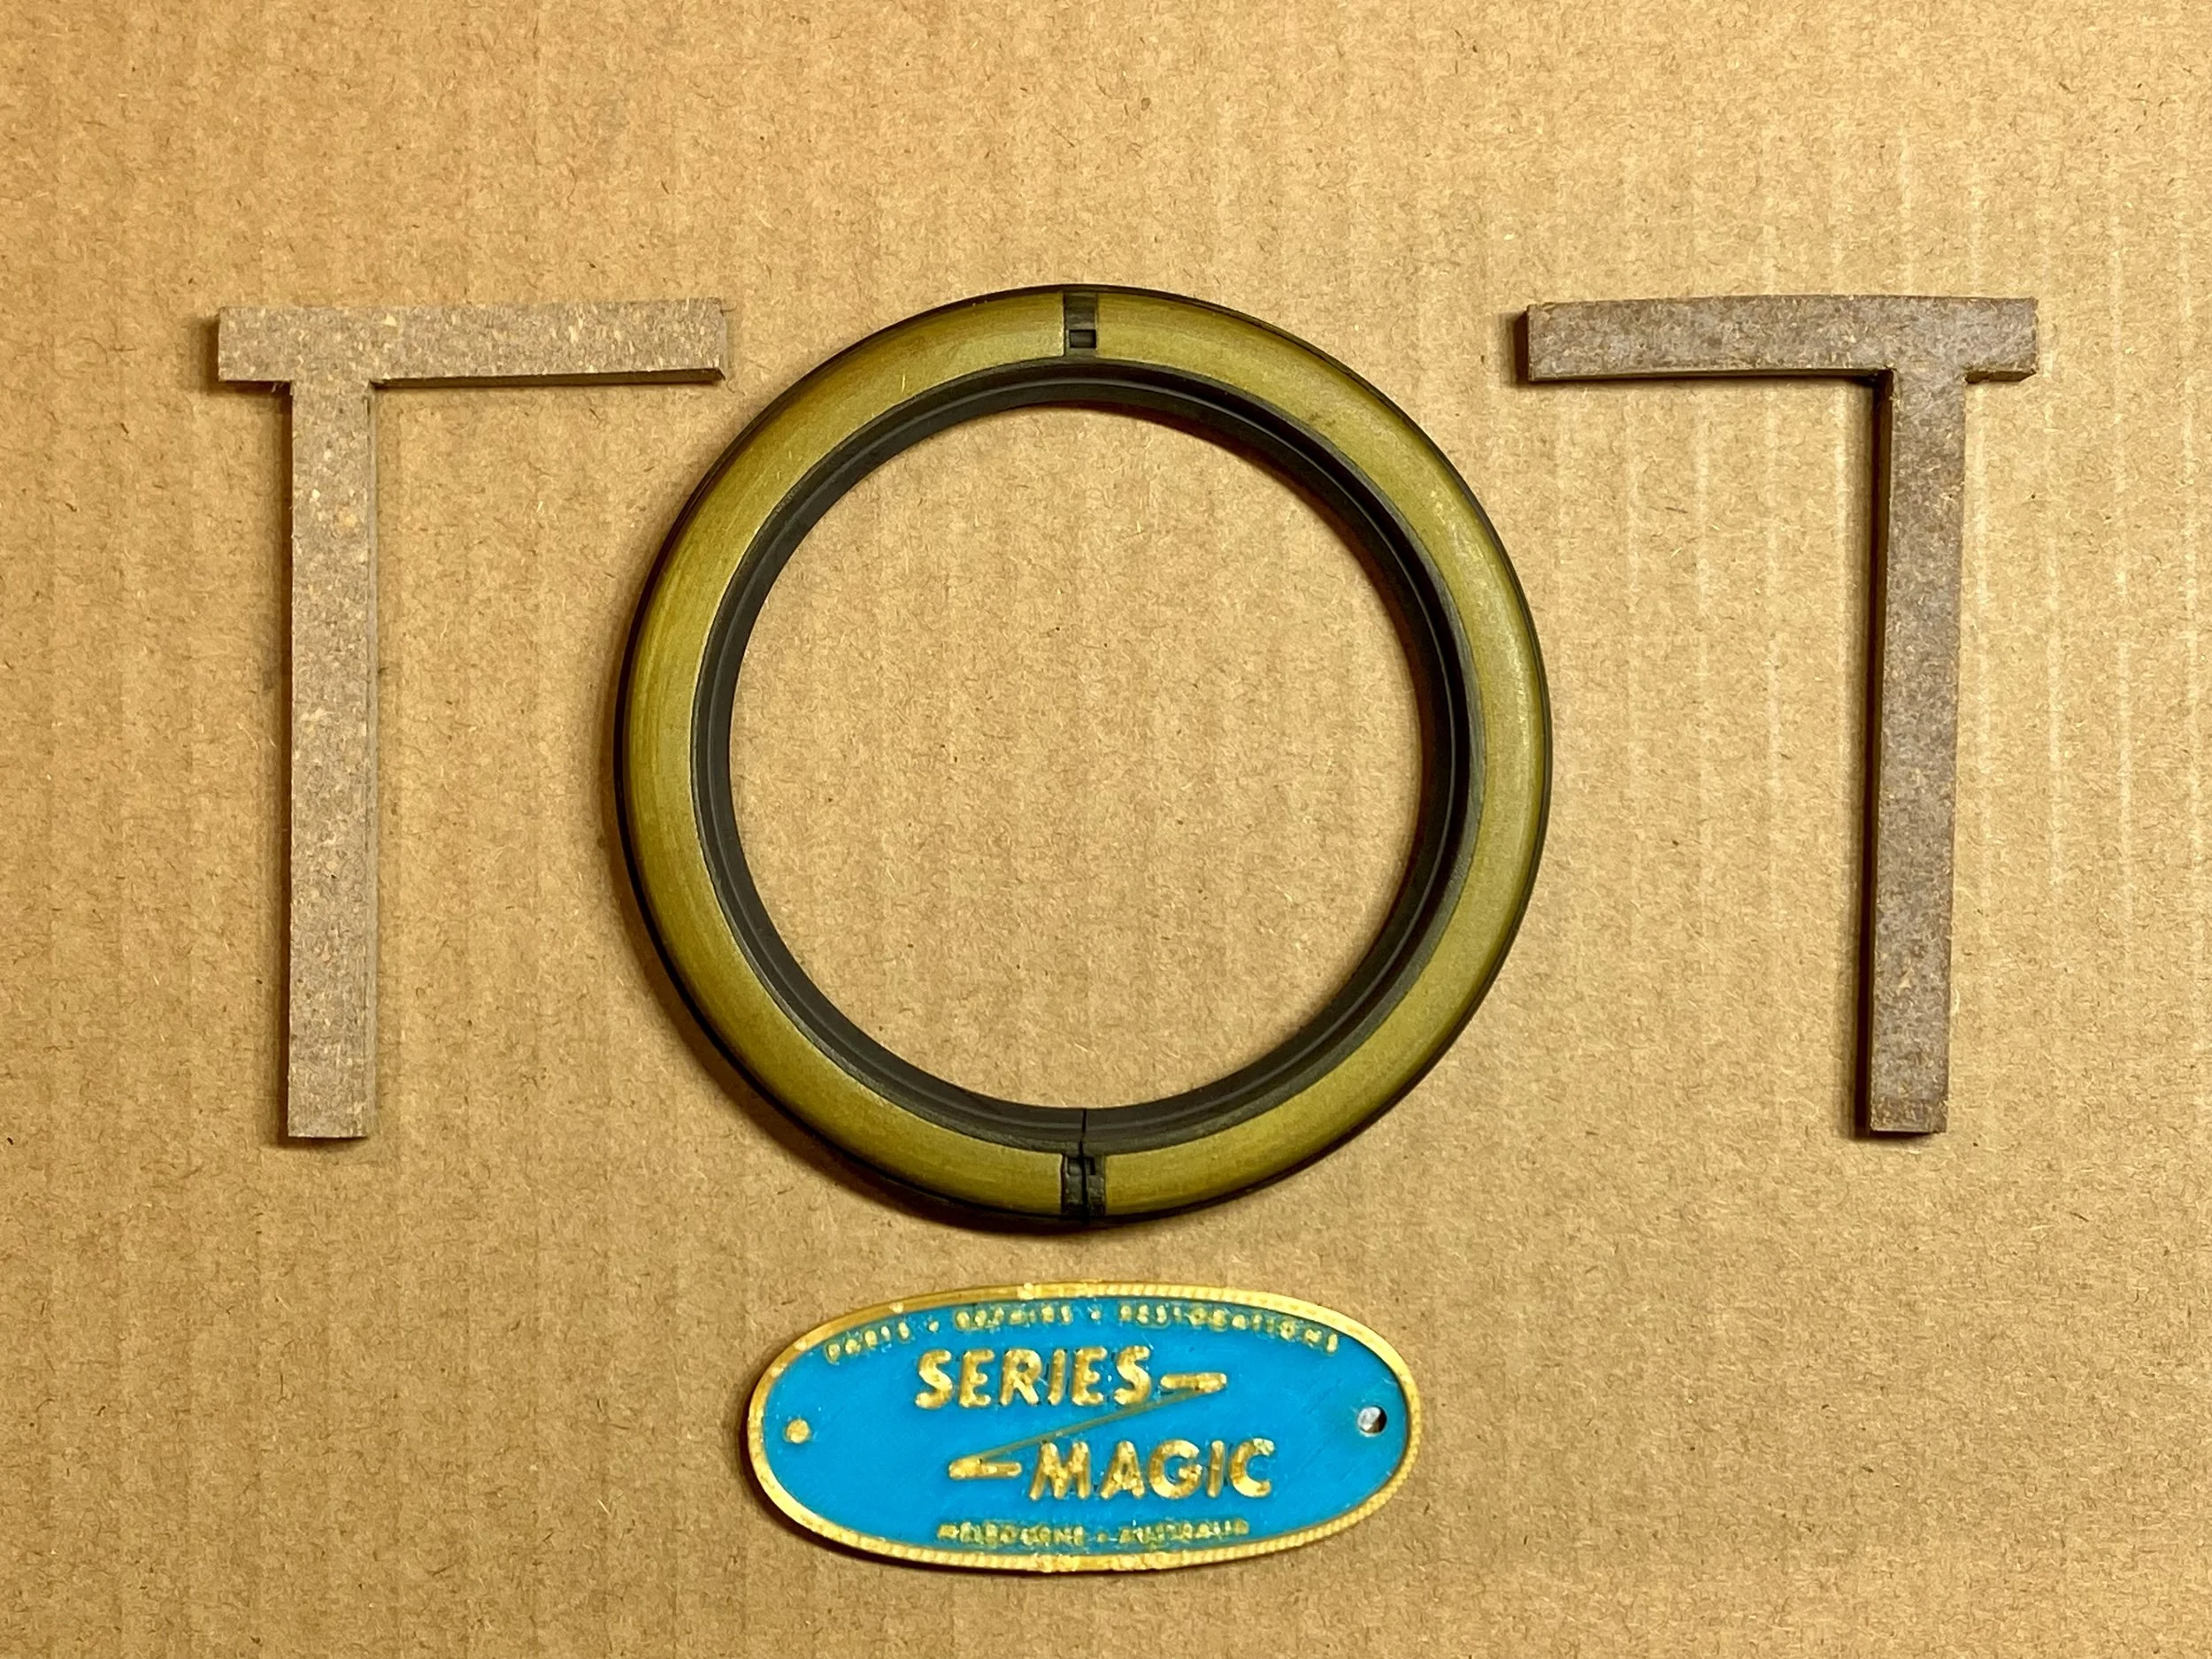
Part number: 542492
A high quality rear main seal and cork T seal set for three main bearing 2.25 litre 4 cylinder Series 2 2a 3 engines; and 2.6 litre 6 cylinder Series 2a 3 engines.
The problem
In our experience, it’s hard to find a rear main seal for these engines that seal properly and reliably. Seals of this type are tricky to install, and incorrect installation is a common cause of leaks after DIY seal replacement. But seal quality (lip profile and diameter) is also a problem.
Our solution
These particular seals are the only ones we’ve been able to source that work reliably in running engines and in our static bench tests. They’re made by a reputable UK-based seals manufacturer.
The details
In our bench tests, we install a seal to a crankshaft mounted vertically on a bench. We then flood the inner recess of the seal with engine oil, leave it overnight and see if any oil has leaked past the seal. These seals pass that test repeatedly: no leaks. Other seals we've tested often fail this simple test. The seals we use and recommend are a nice tight fit on the crankshaft; others are a looser fit, by one to two tenths of a millimetre. If the crankshaft sealing surface has been linished, then the looser-fitting seals can go from marginally effective to useless.
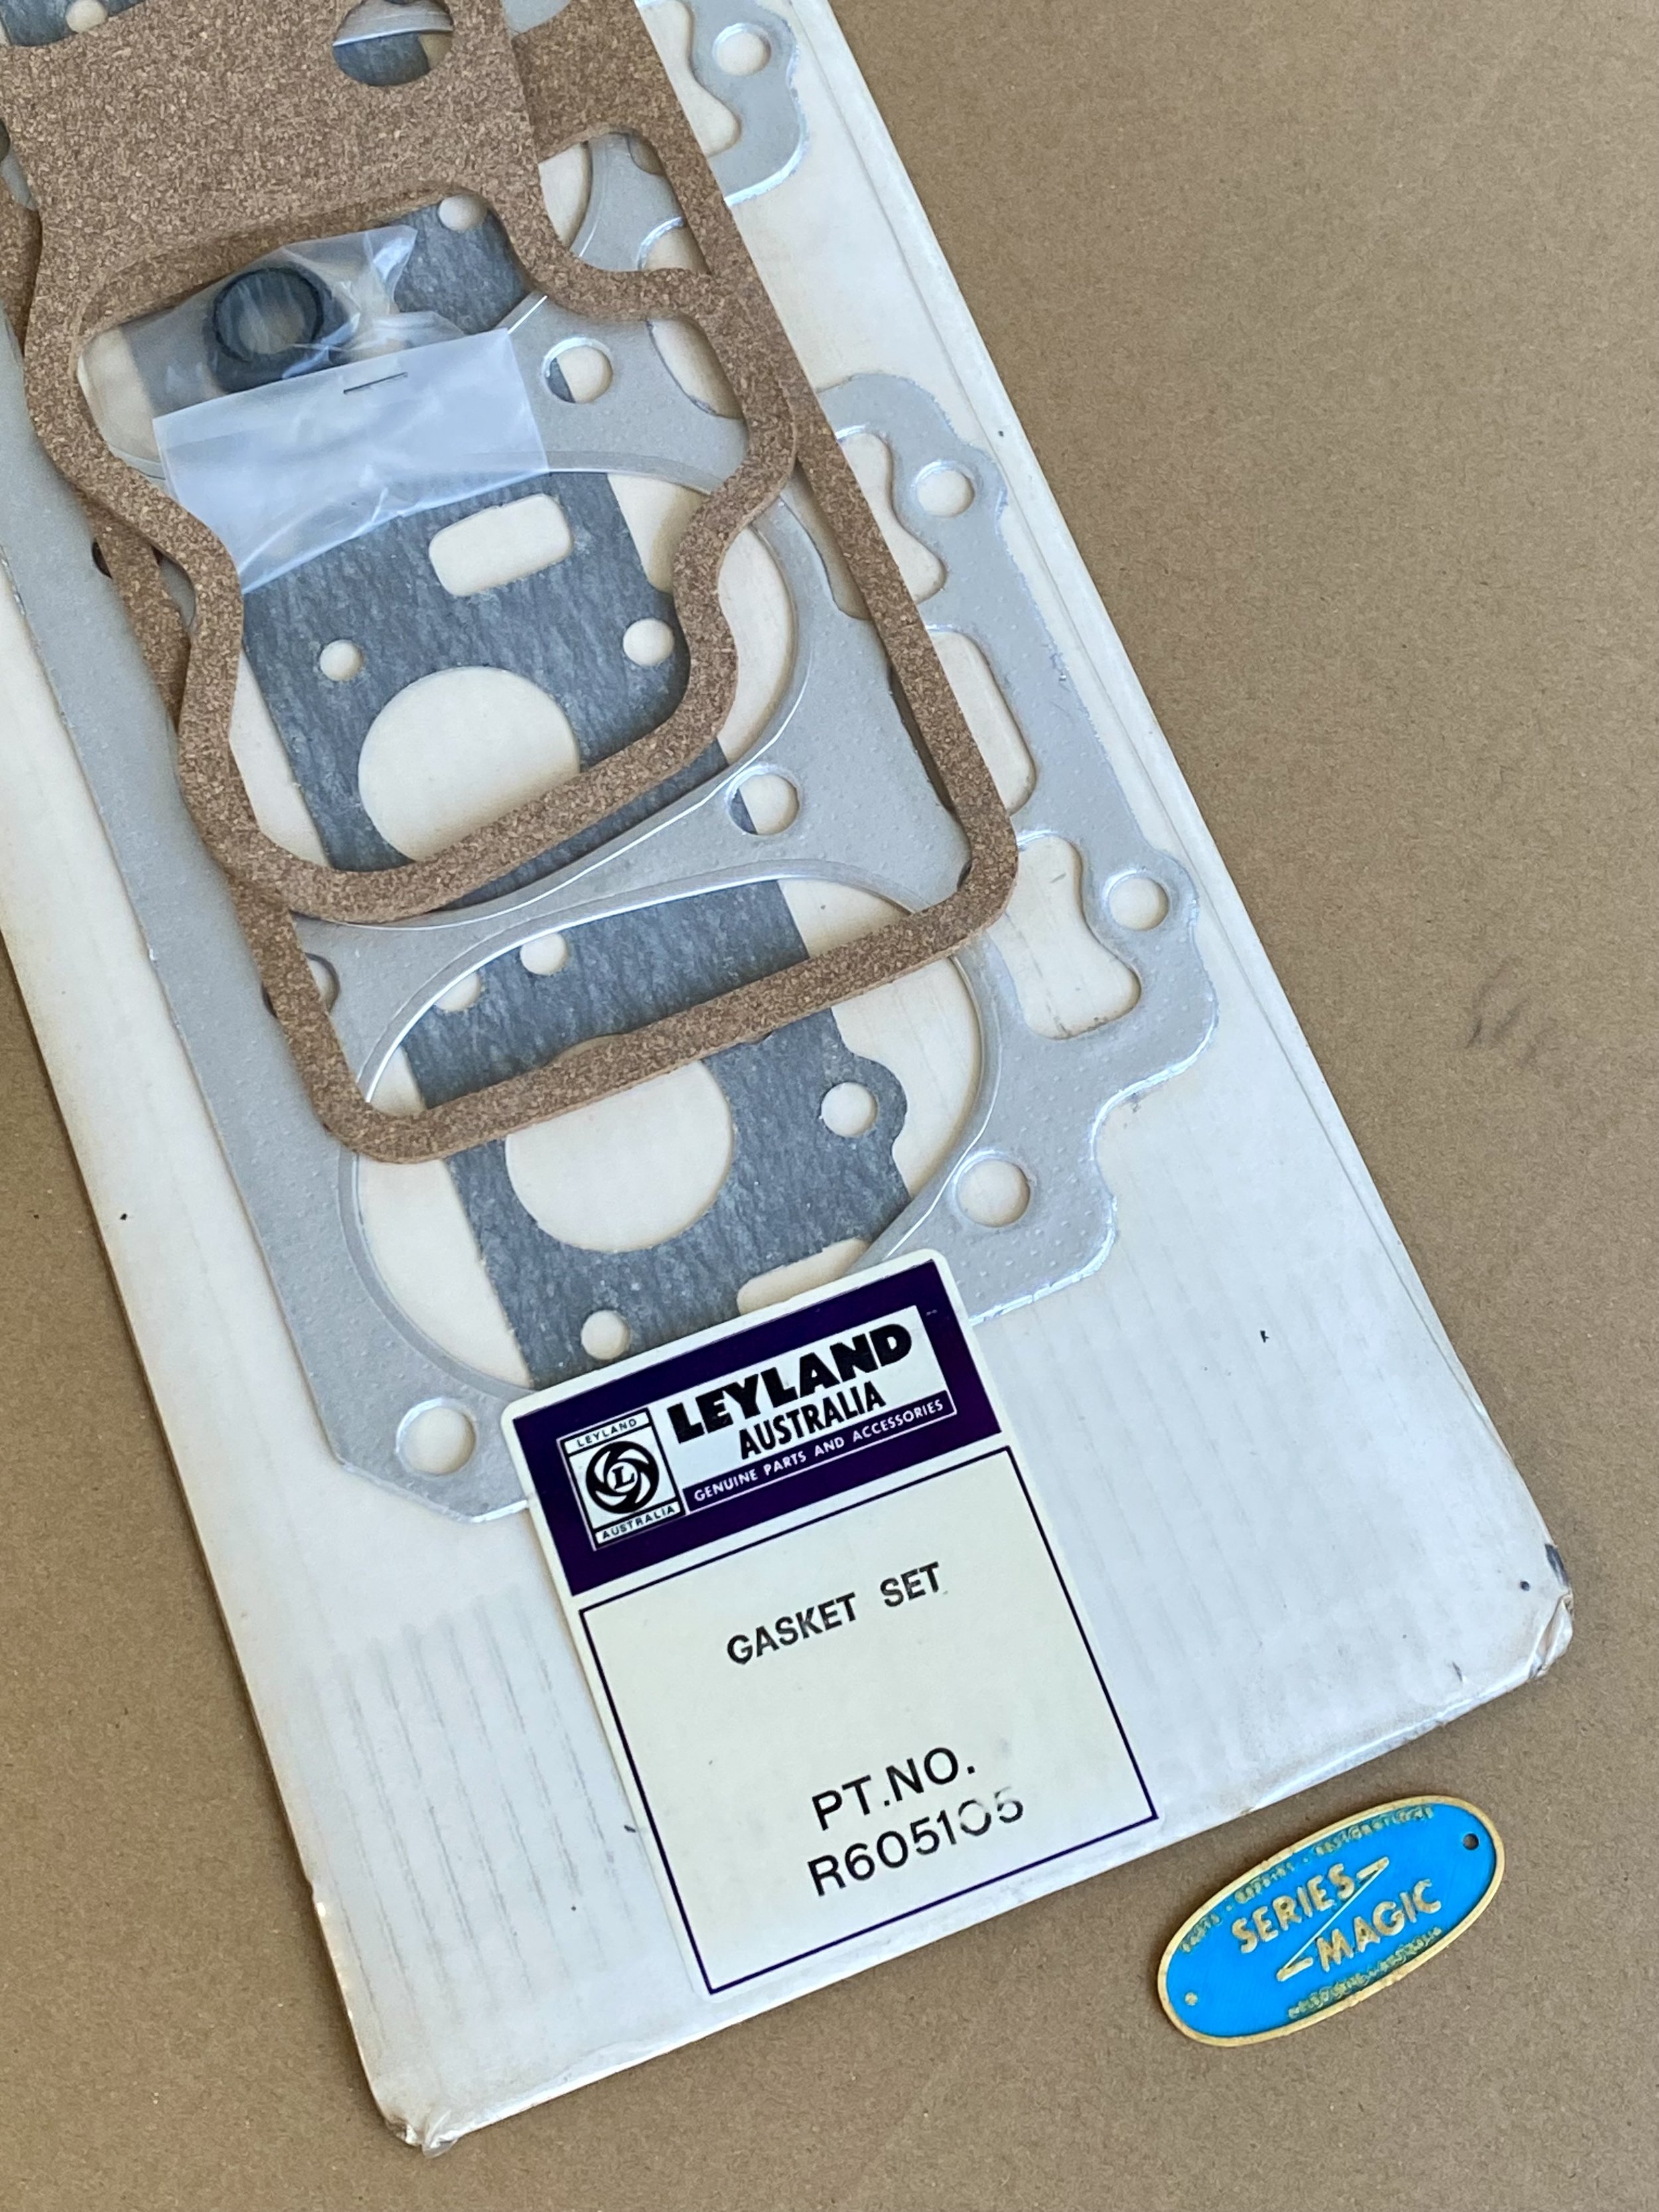
Part number: 605105
The problem
Aftermarket head gaskets for this engine are of the steel shim type. Genuine ones—which are no longer made—are composite type gaskets. The composite construction better accommodates any minor imperfections in the engine block and cylinder head mating surfaces, which may be critical if either the block or head haven't been resurfaced prior to fitting a new gasket. Composite gaskets also offer a more reliable seal between the dissimilar metals of the head (alloy) and cast iron (block), which have different thermal expansion coefficients.
Our solution
We've uncovered a treasure trove of New Old Stock Genuine head gasket kits (also known as VRS kits) Series 2a and Series 3 Land Rovers with a 2.6 litre 6 cylinder engine. These kits feature the superior, composite type head gaskets that Land Rover fitted at the factory and supplied to their network of dealerships. Each kit is opened by us to check for any deterioration in storage.
A rare treasure!
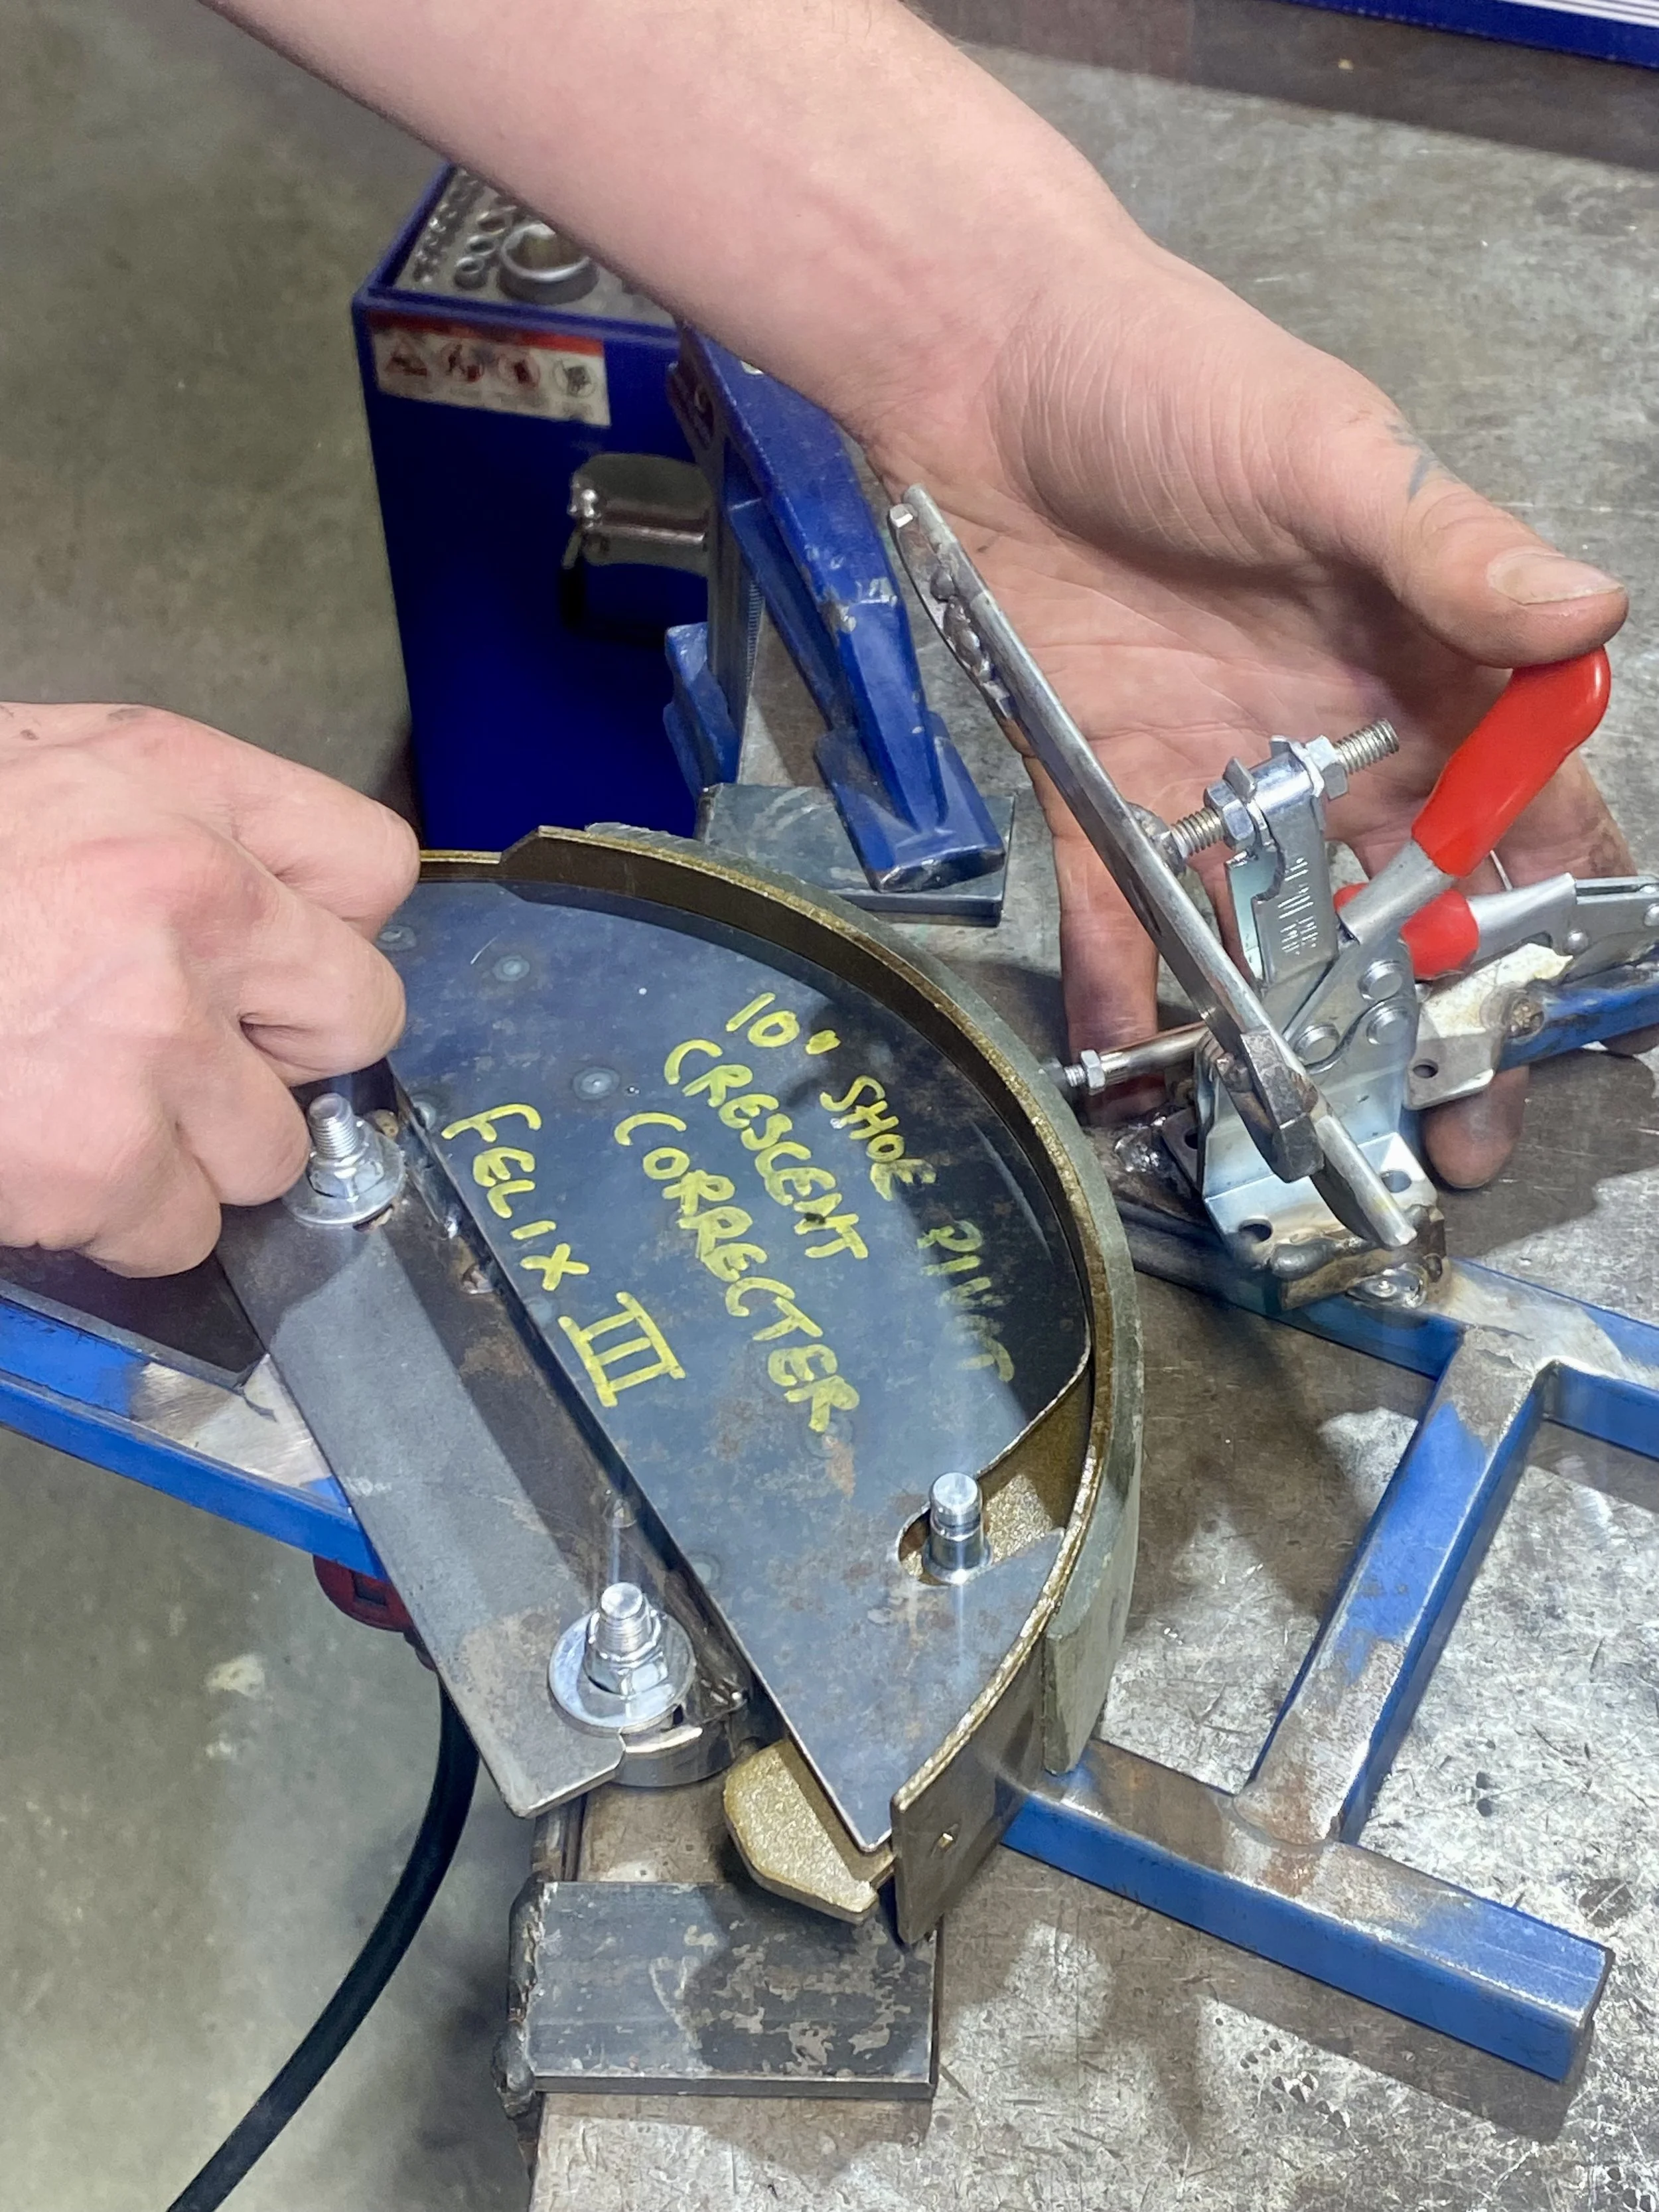
Part numbers: RTC3411 STC2796
The problem
We've discovered that all aftermarket brake shoes of this type—even quality brand ones—have a common design defect: the anchor pin arc is slightly displaced compared with those of old Genuine shoes (new Genuine shoes are unobtainable). This displacement causes a mismatch between shoe lining curvature and drum curvature, even if the linings have been properly radiused.
This is the main reason Series SWB brakes have a reputation for a 'spongy pedal' and shoes that take a long time to bed in, i.e. to make simultaneous contact with the drum from one end of the lining to the other. The consequence is the dreadful brakes that most Series owners take for granted. This is not a Land Rover design flaw, and it's not how these Series left the factory. It's a subtle yet serious aftermarket parts defect that has gone unnoticed for decades, with every manufacturer copying a wrong template.
Our solution
We're trying to persuade a quality brake parts manufacturer to modify their design template. In the meantime, we can supply you with a set of quality new brake shoes that have been modified by us to correct the anchor pin arc curvature. The shoes we supply are also relined with superior linings, and we chamfer the leading and trailing edges of the new linings to prevent the edges catching on the drum.
The details
We began by selecting a very good condition used Genuine shoe, with exceptionally uniform lining wear, as our reference shoe. We then made a test tool that allows us to compare the position and curvature of any shoe's anchor pin arc with those of the reference shoe. Finally, we designed and built a special cutting jig that allows us to correct arc curvatures. The correction is subtle, but it makes a big difference. Our corrected shoes bed in quickly, with a nice firm brake pedal from day one, as Land Rover intended. We've found that most aftermarket shoe linings are excessively hard and/or not properly radiused. We get an old-school local brake specialist to reline sets of new shoes with softer, grippier linings that are correctly radiused to a new drum. These linings give superior brake performance.
Part number: 515406
The problem
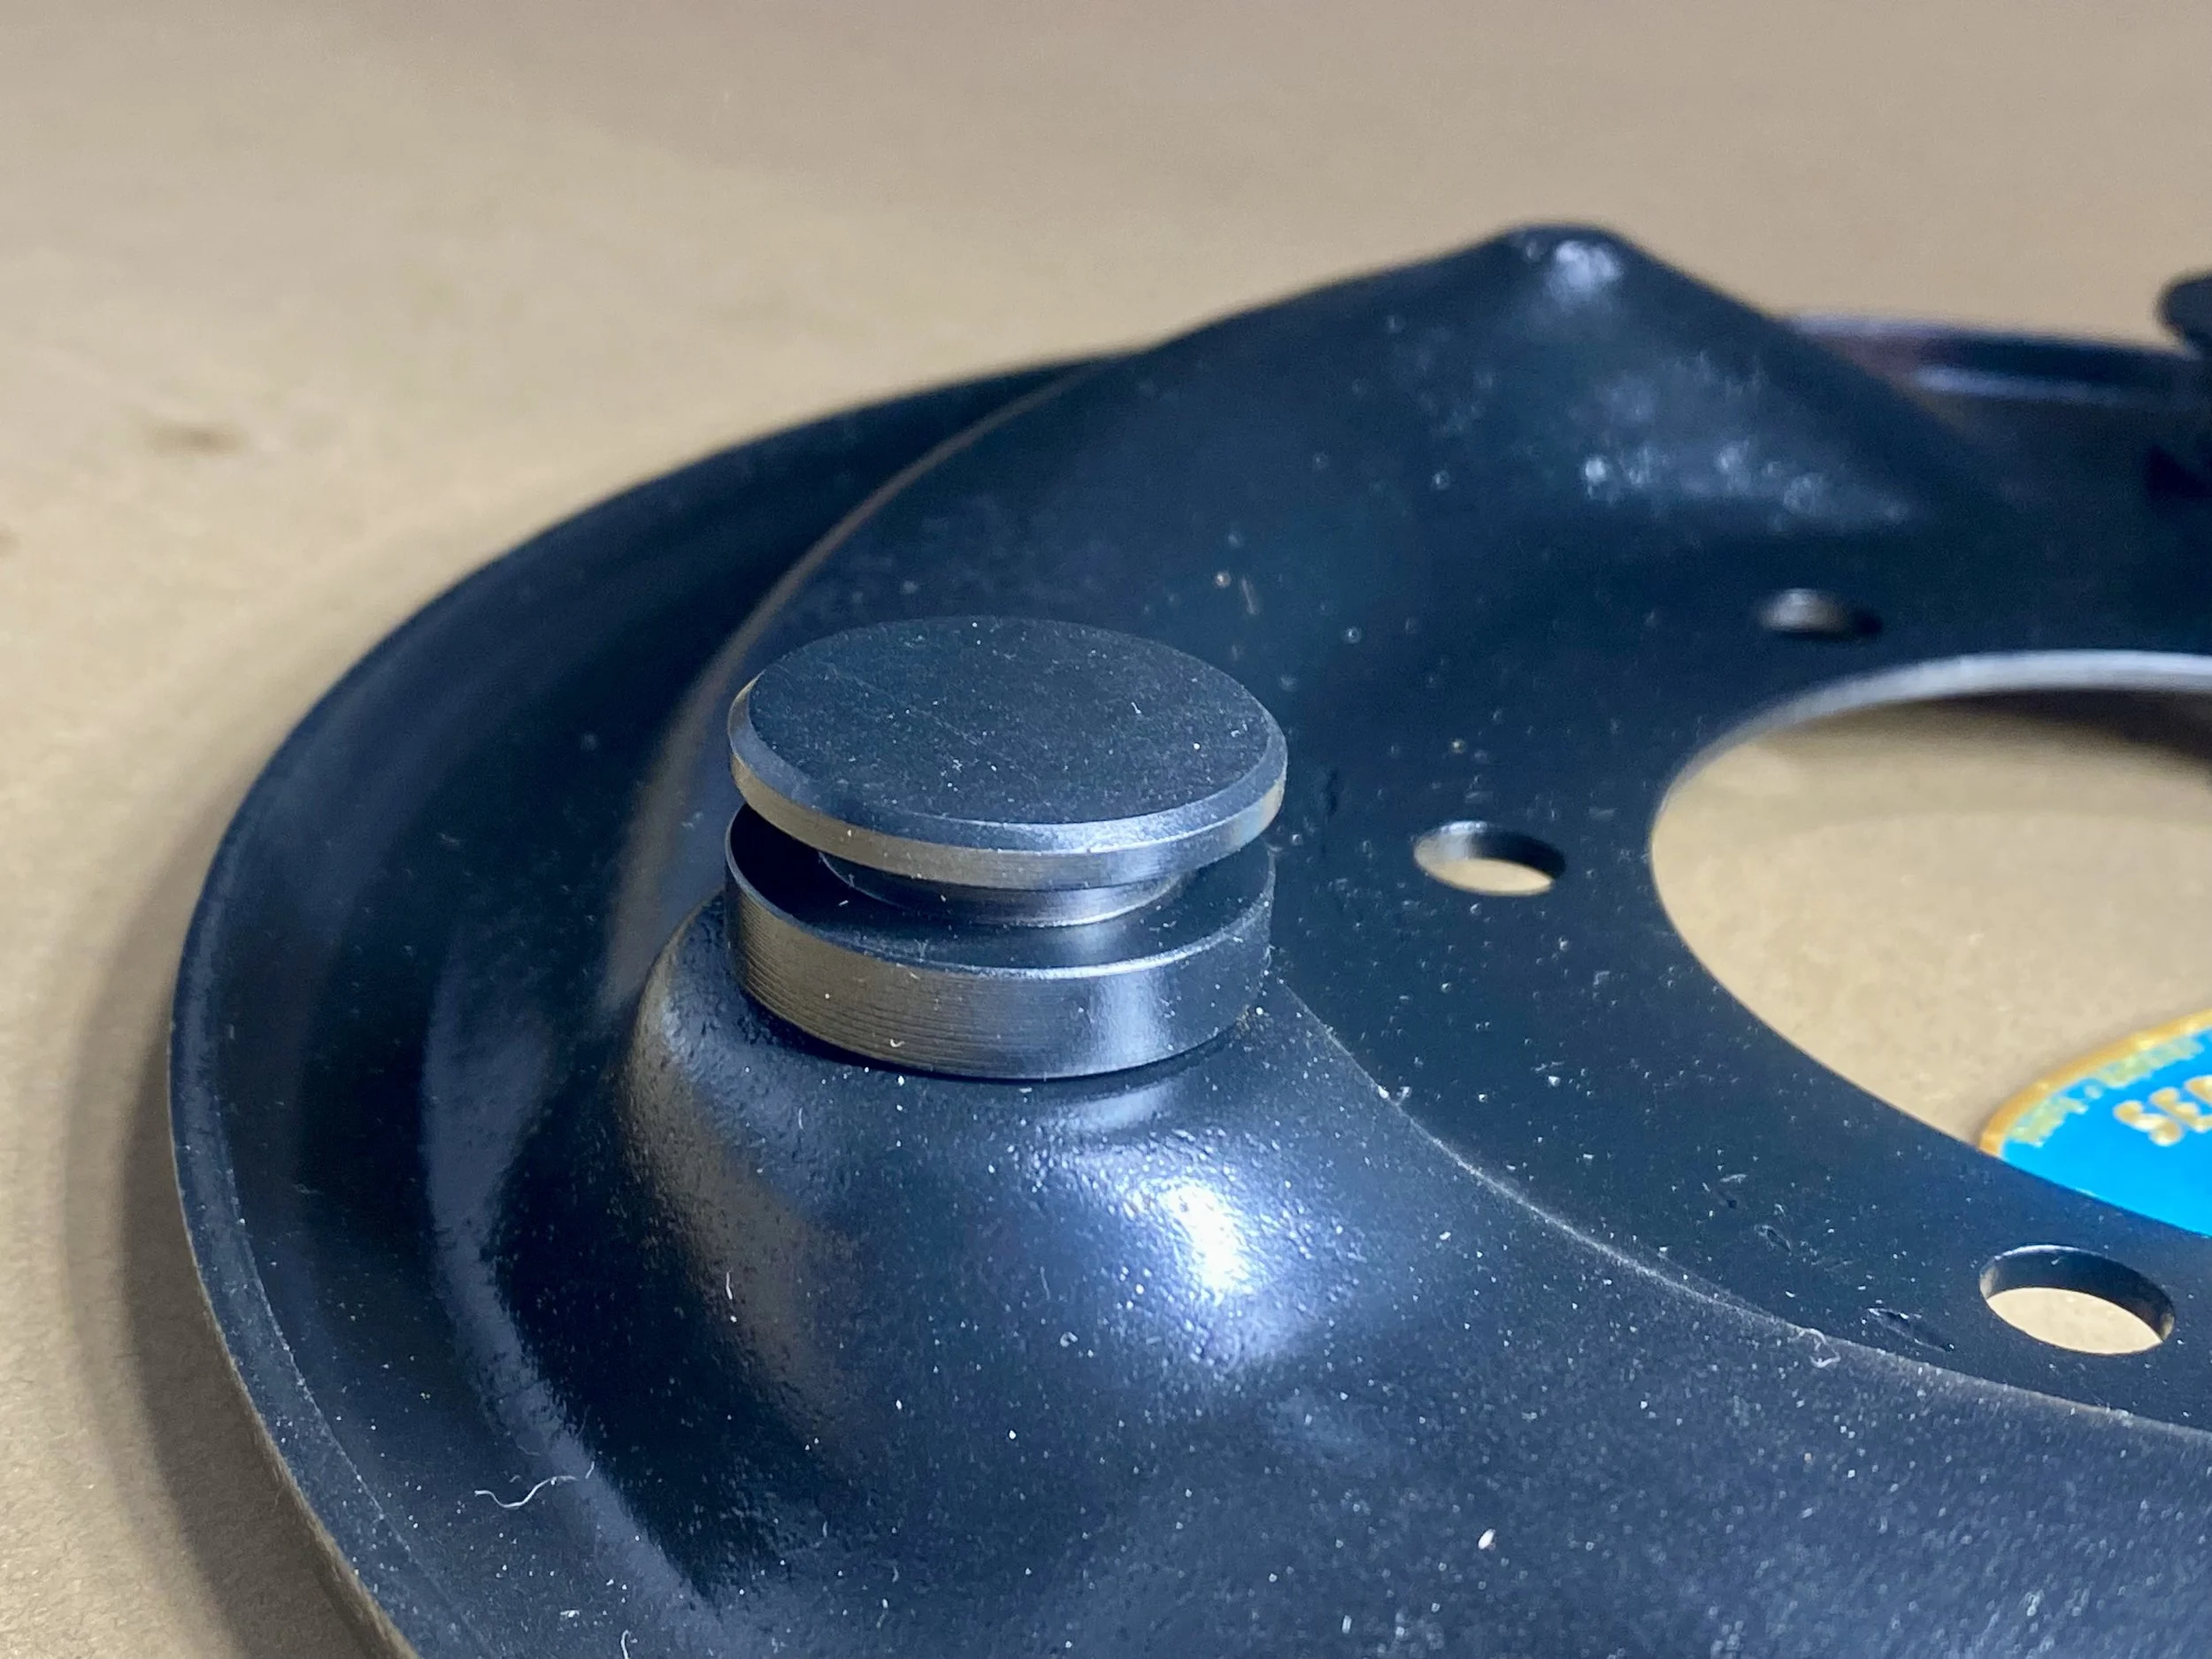
These backing plates have a grooved anchor pin that the brake shoes pivot off. We've found that brake performance and shoe adjustment are compromised if the groove diameter is less than 18.80 mm—just 0.2 mm of wear. Series 1 and Series 2 anchor pins are easily replaced: simply undo the nut. But Series 2a and Series 3 anchor pins were not designed to be replaced. They're press-fitted (Series 2a) or welded (Series 3) to the backing plate, so you have to replace the whole backing plate just to replace the pin. The press-fitted pins often come loose, and we often find that pins are excessively worn. New Old Stock backing plates for Series 2a and Series 3 are only sporadically available, and will soon be unobtainable. Nobody is manufacturing new ones.
Our solution
We remanufacture these backing plates.
The details
If an anchor pin has come loose, we use a Series Magic jig to precisely locate it while we weld it securely in place. If a pin is worn beyond the 0.2 mm wear limit, we replace it. Land Rover didn't intend these press-fitted or welded anchor pins to be replaced, so nobody ever made them as a spare part—until now. We’ve designed them and had a local engineering firm make them for us. We repair or replace the snail cam if needed, and we weld in place press-fitted pins to stop them coming loose. Our remanufactured backing plates are bead blasted, etch primed and painted in satin black.
Part number: 515405
The problem
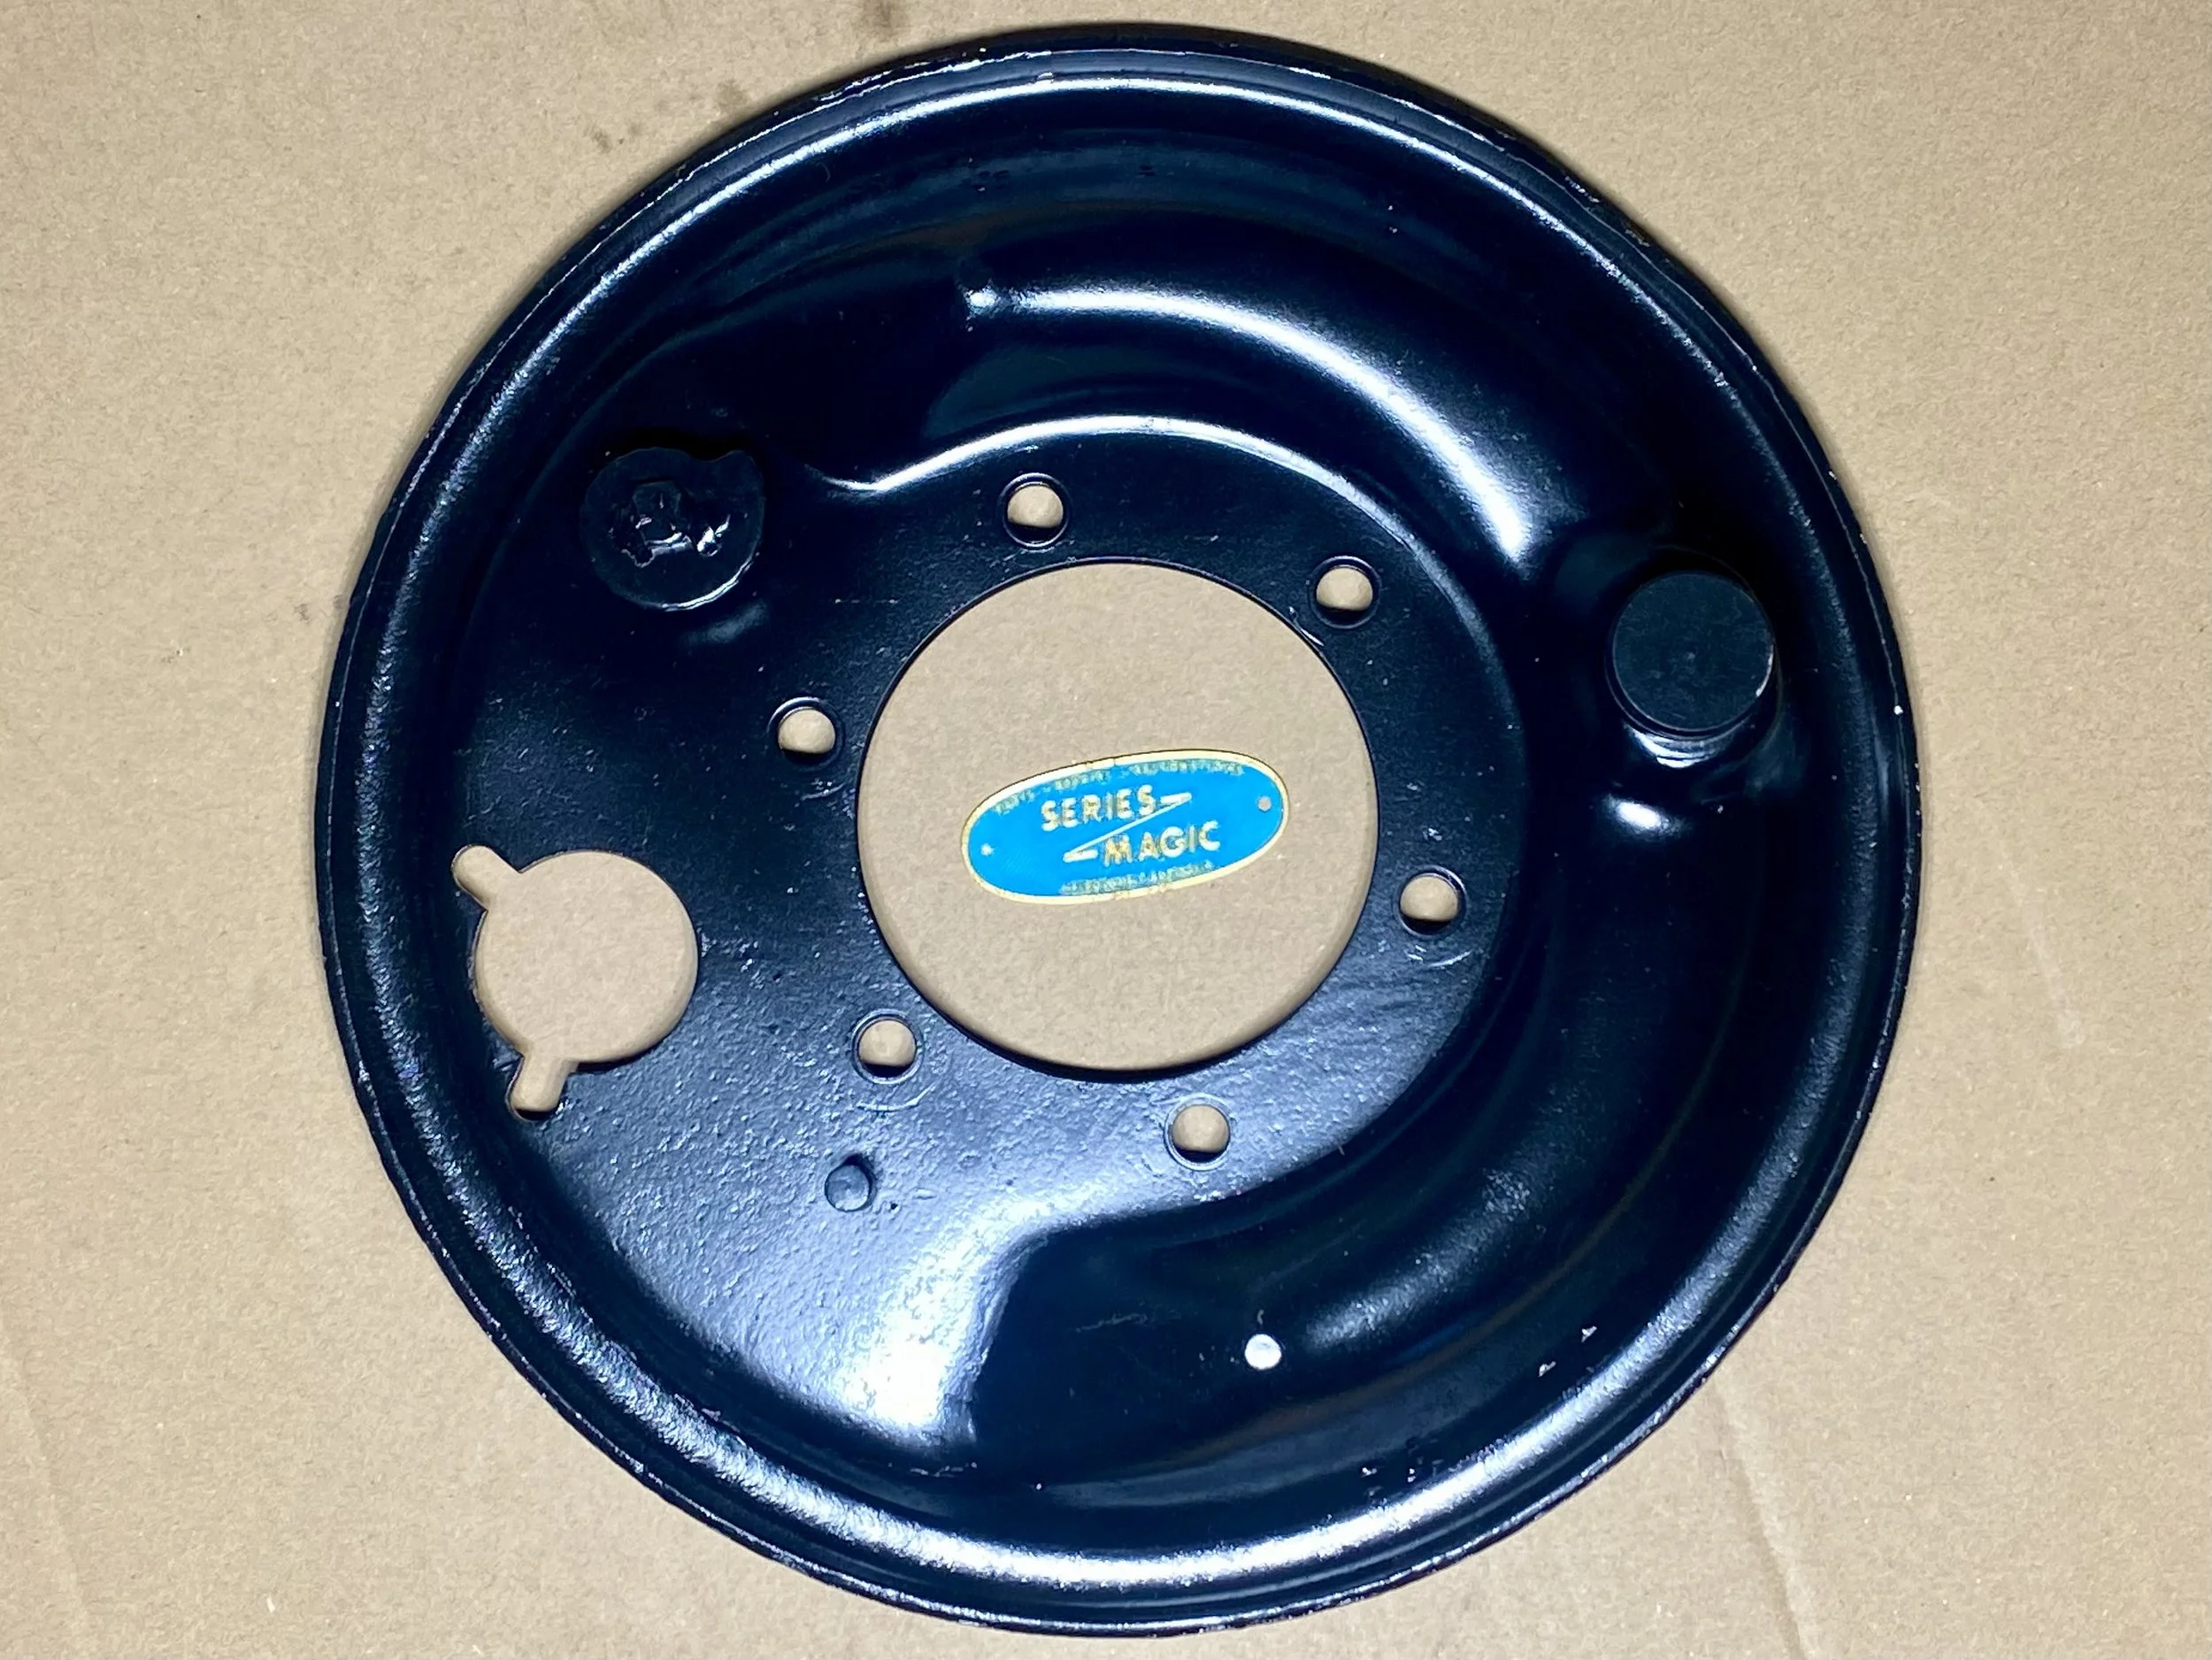
These backing plates have a grooved anchor pin that the brake shoes pivot off. We've found that brake performance and shoe adjustment are compromised if the groove diameter is less than 18.80 mm—just 0.2 mm of wear. Series 1 and Series 2 anchor pins are easily replaced: simply undo the nut. But Series 2a and Series 3 anchor pins were not designed to be replaced. They're press-fitted (Series 2a) or welded (Series 3) to the backing plate, so you have to replace the whole backing plate just to replace the pin. The press-fitted pins often come loose, and we often find that pins are excessively worn. New Old Stock backing plates for Series 2a and Series 3 are only sporadically available, and will soon be unobtainable. Nobody is manufacturing new ones.
Our solution
We remanufacture these backing plates.
The details
If an anchor pin has come loose, we use a Series Magic jig to precisely locate it while we weld it securely in place. If a pin is worn beyond the 0.2 mm wear limit, we replace it. Land Rover didn't intend these press-fitted or welded anchor pins to be replaced, so nobody ever made them as a spare part—until now. We’ve designed them and had a local engineering firm make them for us. We repair or replace the snail cam if needed, and we weld in place press-fitted pins to stop them coming loose. Our remanufactured backing plates are bead blasted, etch primed and painted in satin black.
Part numbers: 301437 338780 338871
The problem
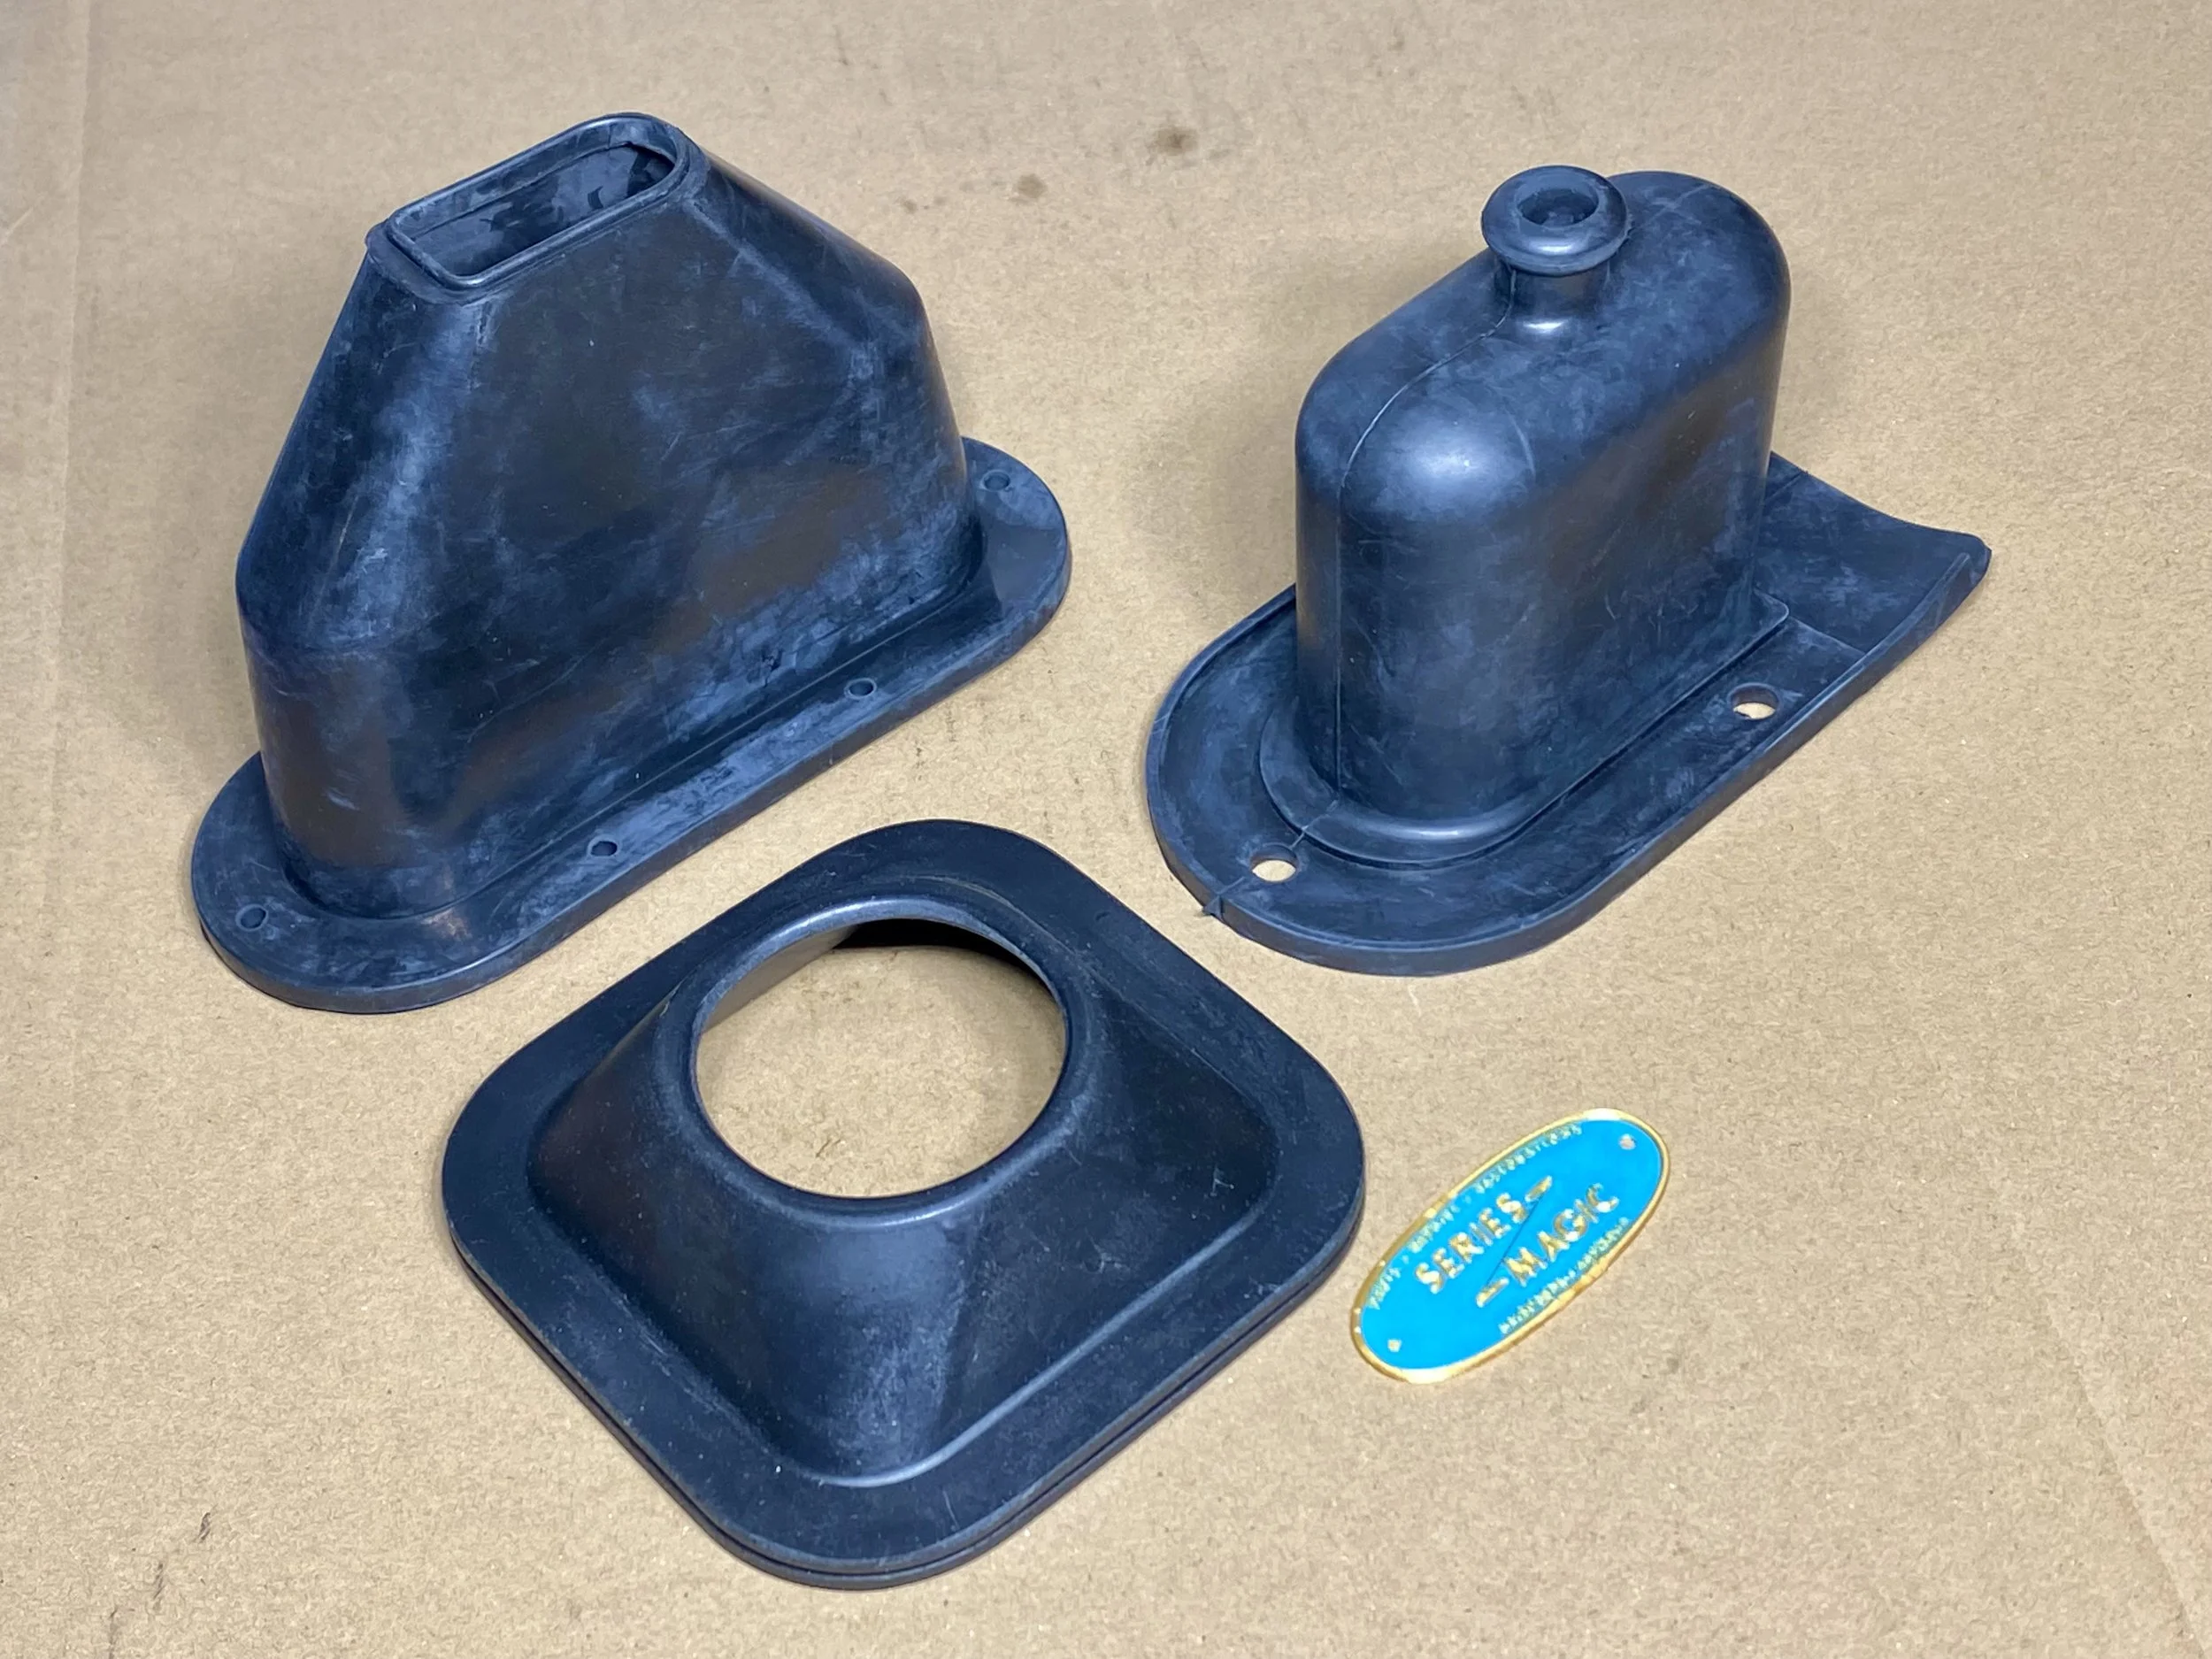
Most aftermarket lever boots for Series Land Rovers are notoriously disappointing. The rubber is too thick and inflexible, which makes them difficult to install, and can restrict full travel of the red lever and handbrake lever. They tend to split or begin to perish within a year of fitment. The factory-fitted ones were far more durable: some are still intact.
Our solution
We've sourced high quality rubber boots. They're very durable. They're also easy to fit and don't restrict full lever travel. This is a set of three boots: one for the gearbox gear stick, one for the red lever and one for the handbrake lever.
The details
These boots fit all Series 2a and Series 3 Land Rovers (except for the Series 3 Stage 1 V8 or 4BD1 diesel) with a handbrake lever that bends sharply upwards where it exits the seat box (rather than a lever that exits horizontally). This upwards-pointing lever was introduced in 1967, and the handbrake lever boot supplied in this kit suits this lever type.
Part number: 243294
The problem
This safety-critical brake system part was unobtainable for years.
Our solution
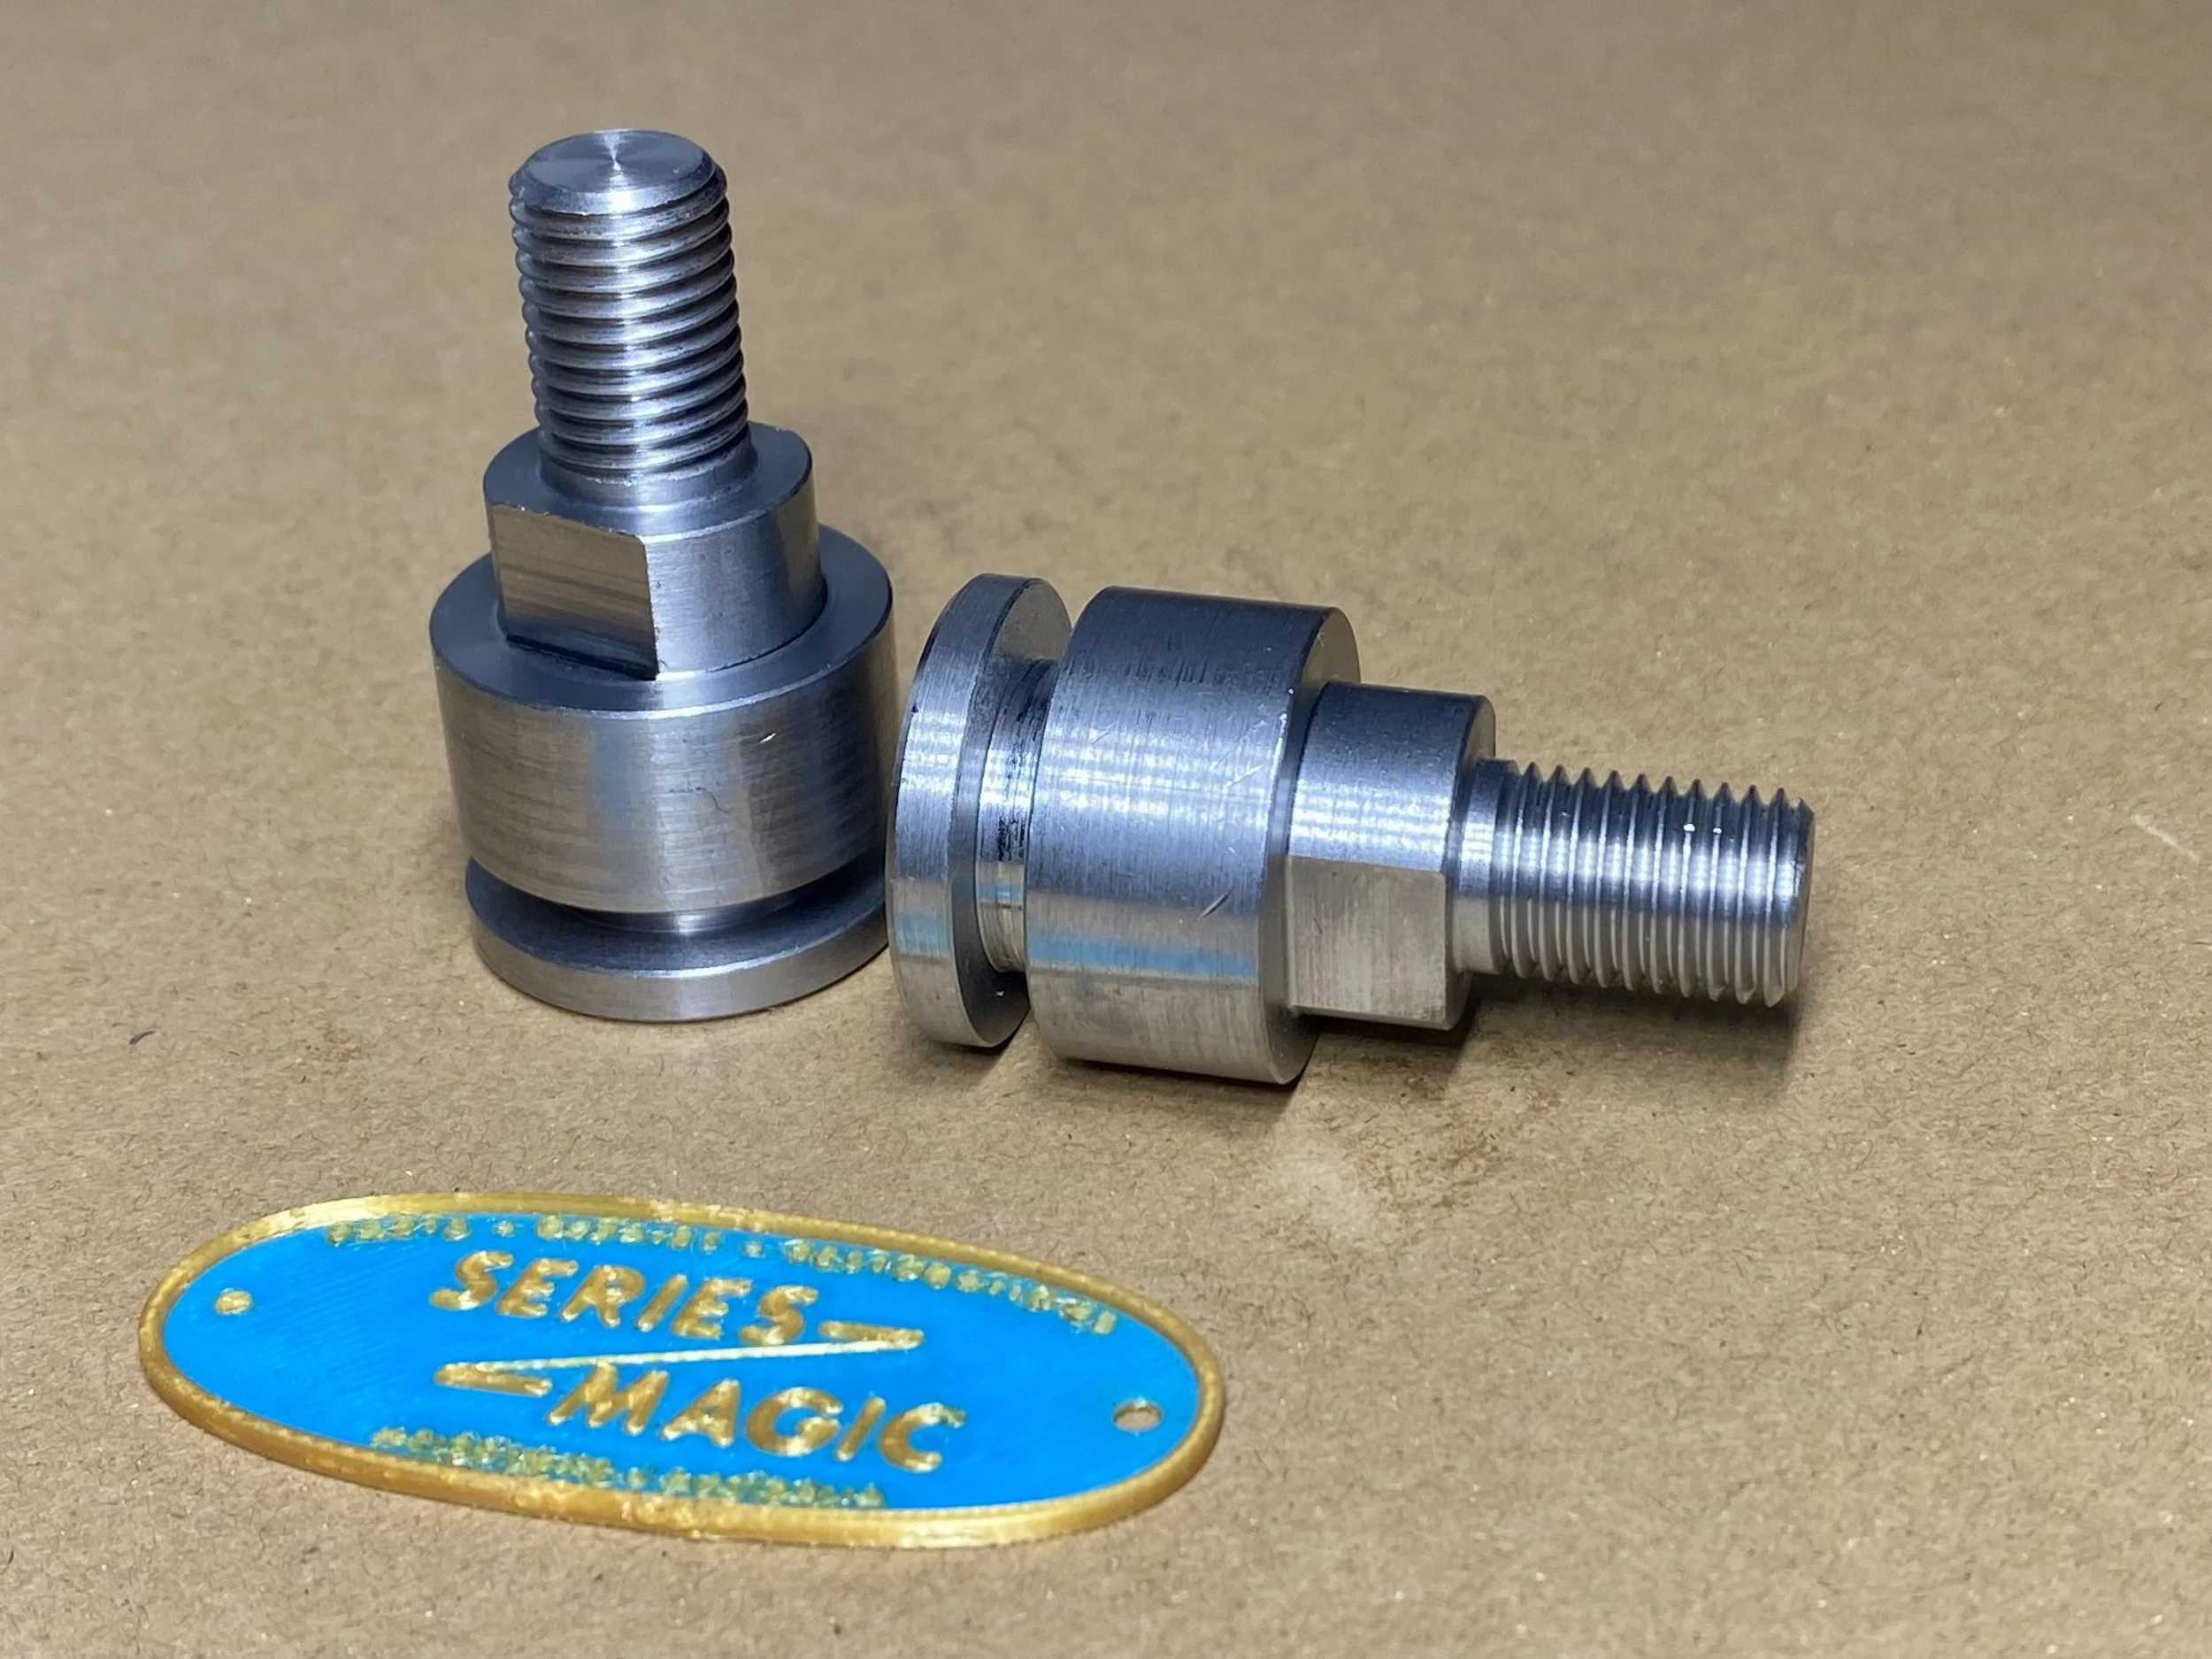
We've copied the original design and had them manufactured to the precise specifications of the originals by a local engineering firm.
The details
Land Rover specified no wear limit for the groove in these pins, which wears as the brake shoe pivots in the groove every time the brakes are applied and released. We've found that as little as a large fraction of a millimetre of wear across the groove diameter is enough to cause two problems: insufficient shoe adjustment on the 'snail cam' adjuster, even with new shoe linings; and shoe linings that take a very long time to bed in—even if correctly radiused—resulting in substandard brakes and uneven lining wear.
In our workshop, we replace these pins if the groove diameter is less than 18.80 mm, for a 0.2mm wear limit. (Note that the earlier, 80 inch wheelbase Series 1 version of this pin, part number 218969, should not be fitted to an 86 or 88 inch wheelbase Series 1: the early and later versions are dimensionally different).
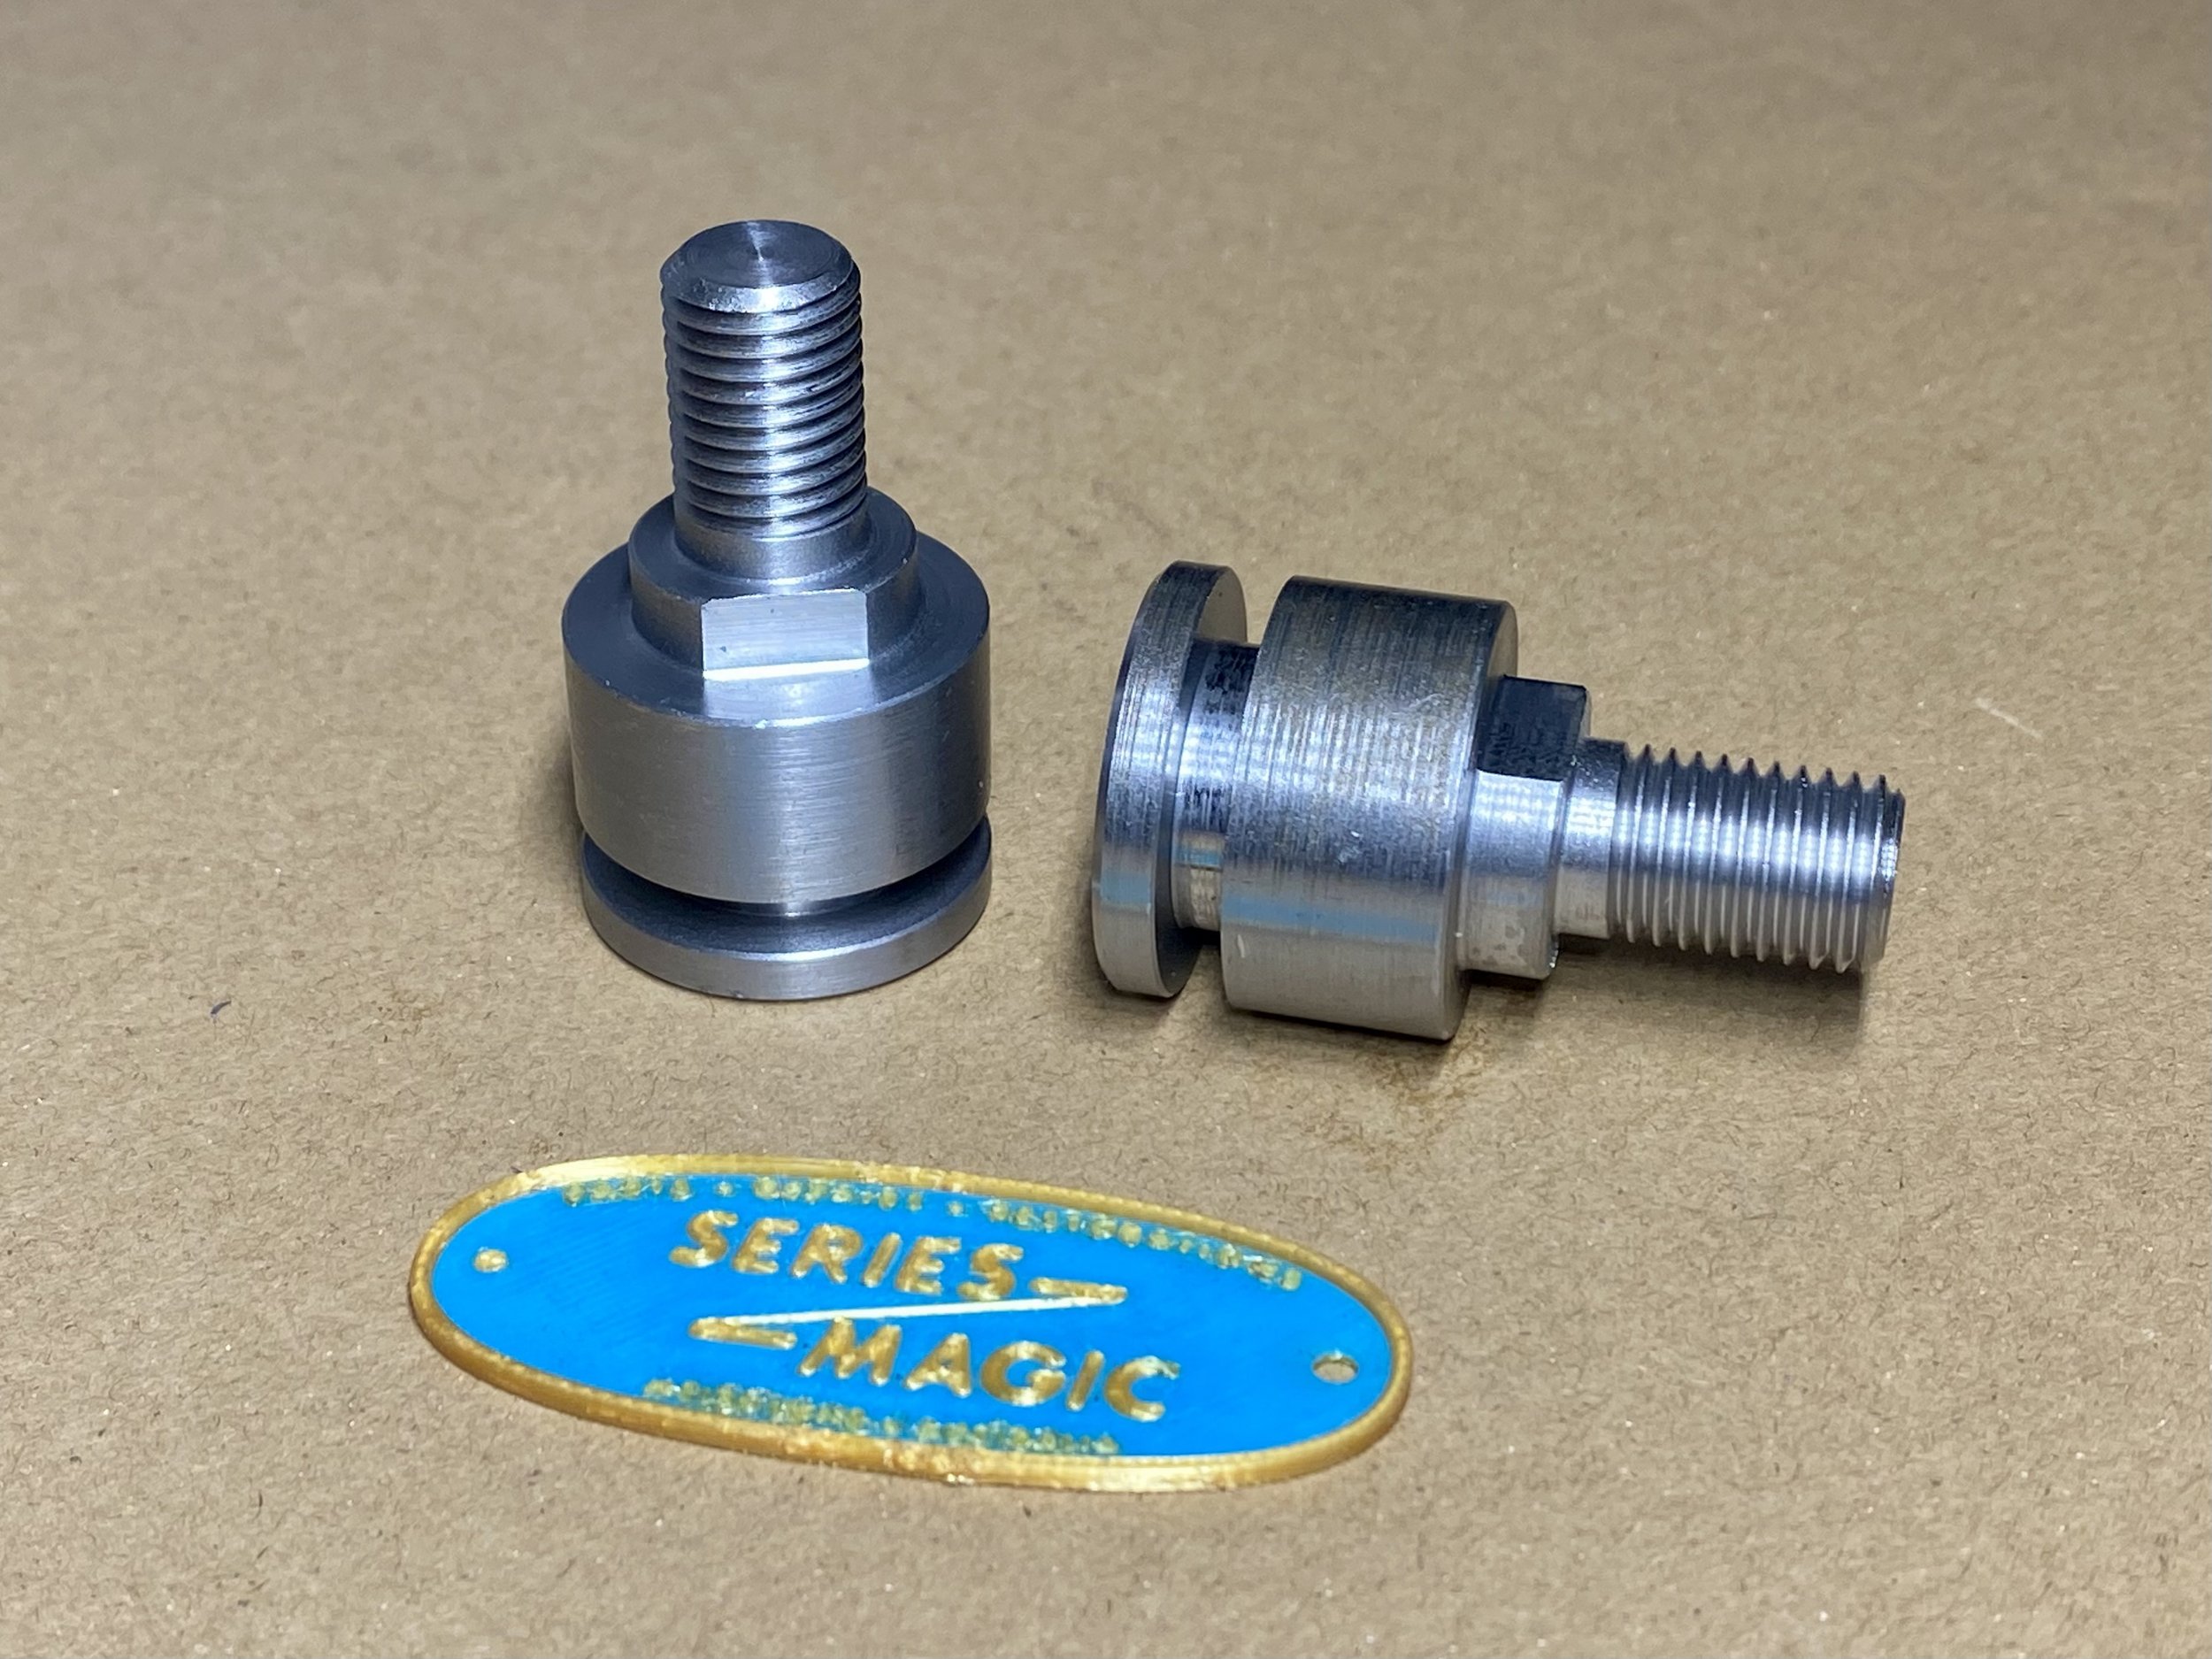
Part number: 218969
The problem
Until now, new brake shoe anchor pins for early Series 1 Land Rovers were only available from one specialist supplier based in the UK.
The Series Magic solution
We've copied the original design and had them manufactured to the precise specifications of the originals by a local engineering firm.
The details
Land Rover specified no wear limit for the groove in these pins, which wears as the brake shoe pivots in the groove every time the brakes are applied and released. We've found that as little as a large fraction of a millimetre of wear across the groove diameter is enough to cause two problems: insufficient shoe adjustment on the 'snail cam' adjuster, even with new shoe linings; and shoe linings that take a long time to bed in—even if correctly radiused—resulting in substandard brakes and uneven lining wear. In our workshop, we replace these anchor pins if the groove diameter is less than 18.80 mm, for a 0.2 mm wear limit. (Note that the later, 86 or 88 inch wheelbase Series 1 version of this pin, part number 243294, should not be fitted to an 80 inch wheelbase Series 1: the early and later versions are dimensionally different).
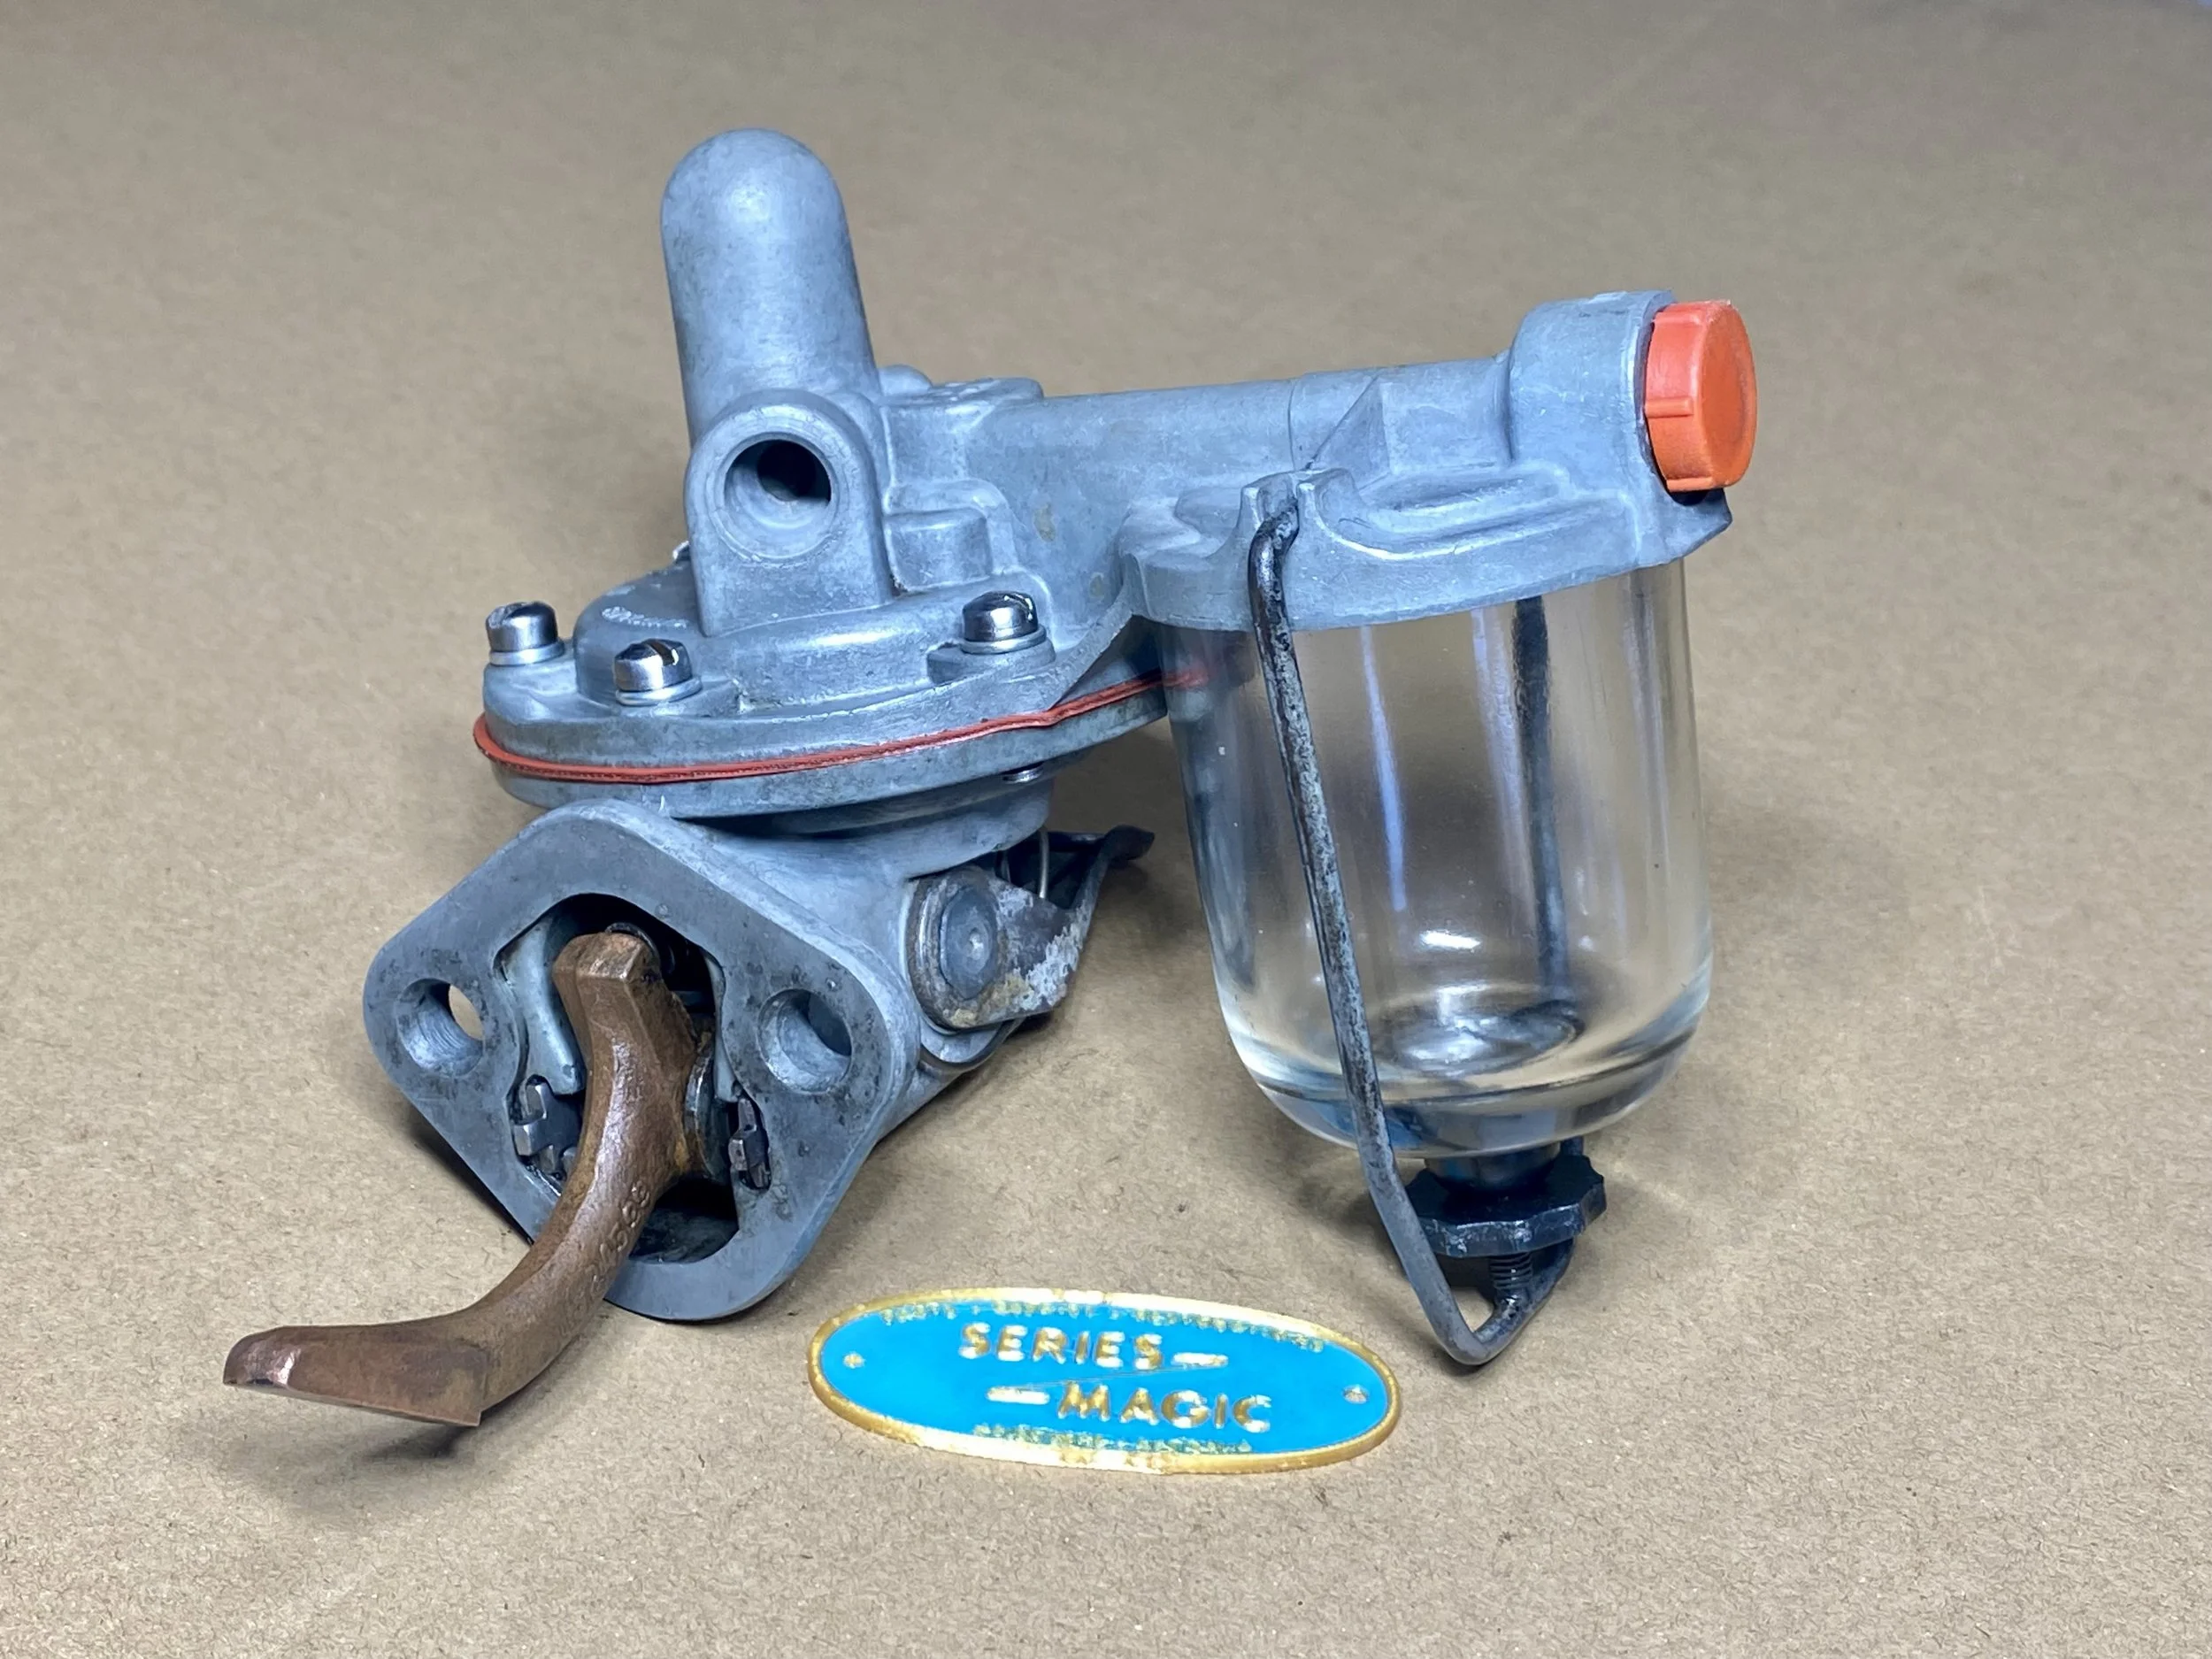
Part number: 549761
The problem
Aftermaket copies of these Series fuel pumps are often poor quality and unreliable, and we've found there's no consistency even within a brand. Common issues are inferior alloy castings, poor quality valves, too much or too little fuel pressure, and engine oil leakage from the hand priming lever hinge (which is not a servicable part). If the hinge leaks, it drips oil onto the front drive shaft—which spatters oil all over the engine bay. Assembly errors are also common.
The Series Magic solution
We source and disassemble used Genuine fuel pumps and reject any castings with defects. We select a set of good-condition upper and lower castings and clean them internally and externally, removing any oxidised alloy deposits but preserving some of the external patina. We then reassemble them with quality replacement parts (hard to find!), test them for leakage, and pressure test them using a purpose-build test apparatus. We back our restored fuel pumps with a one year warranty.
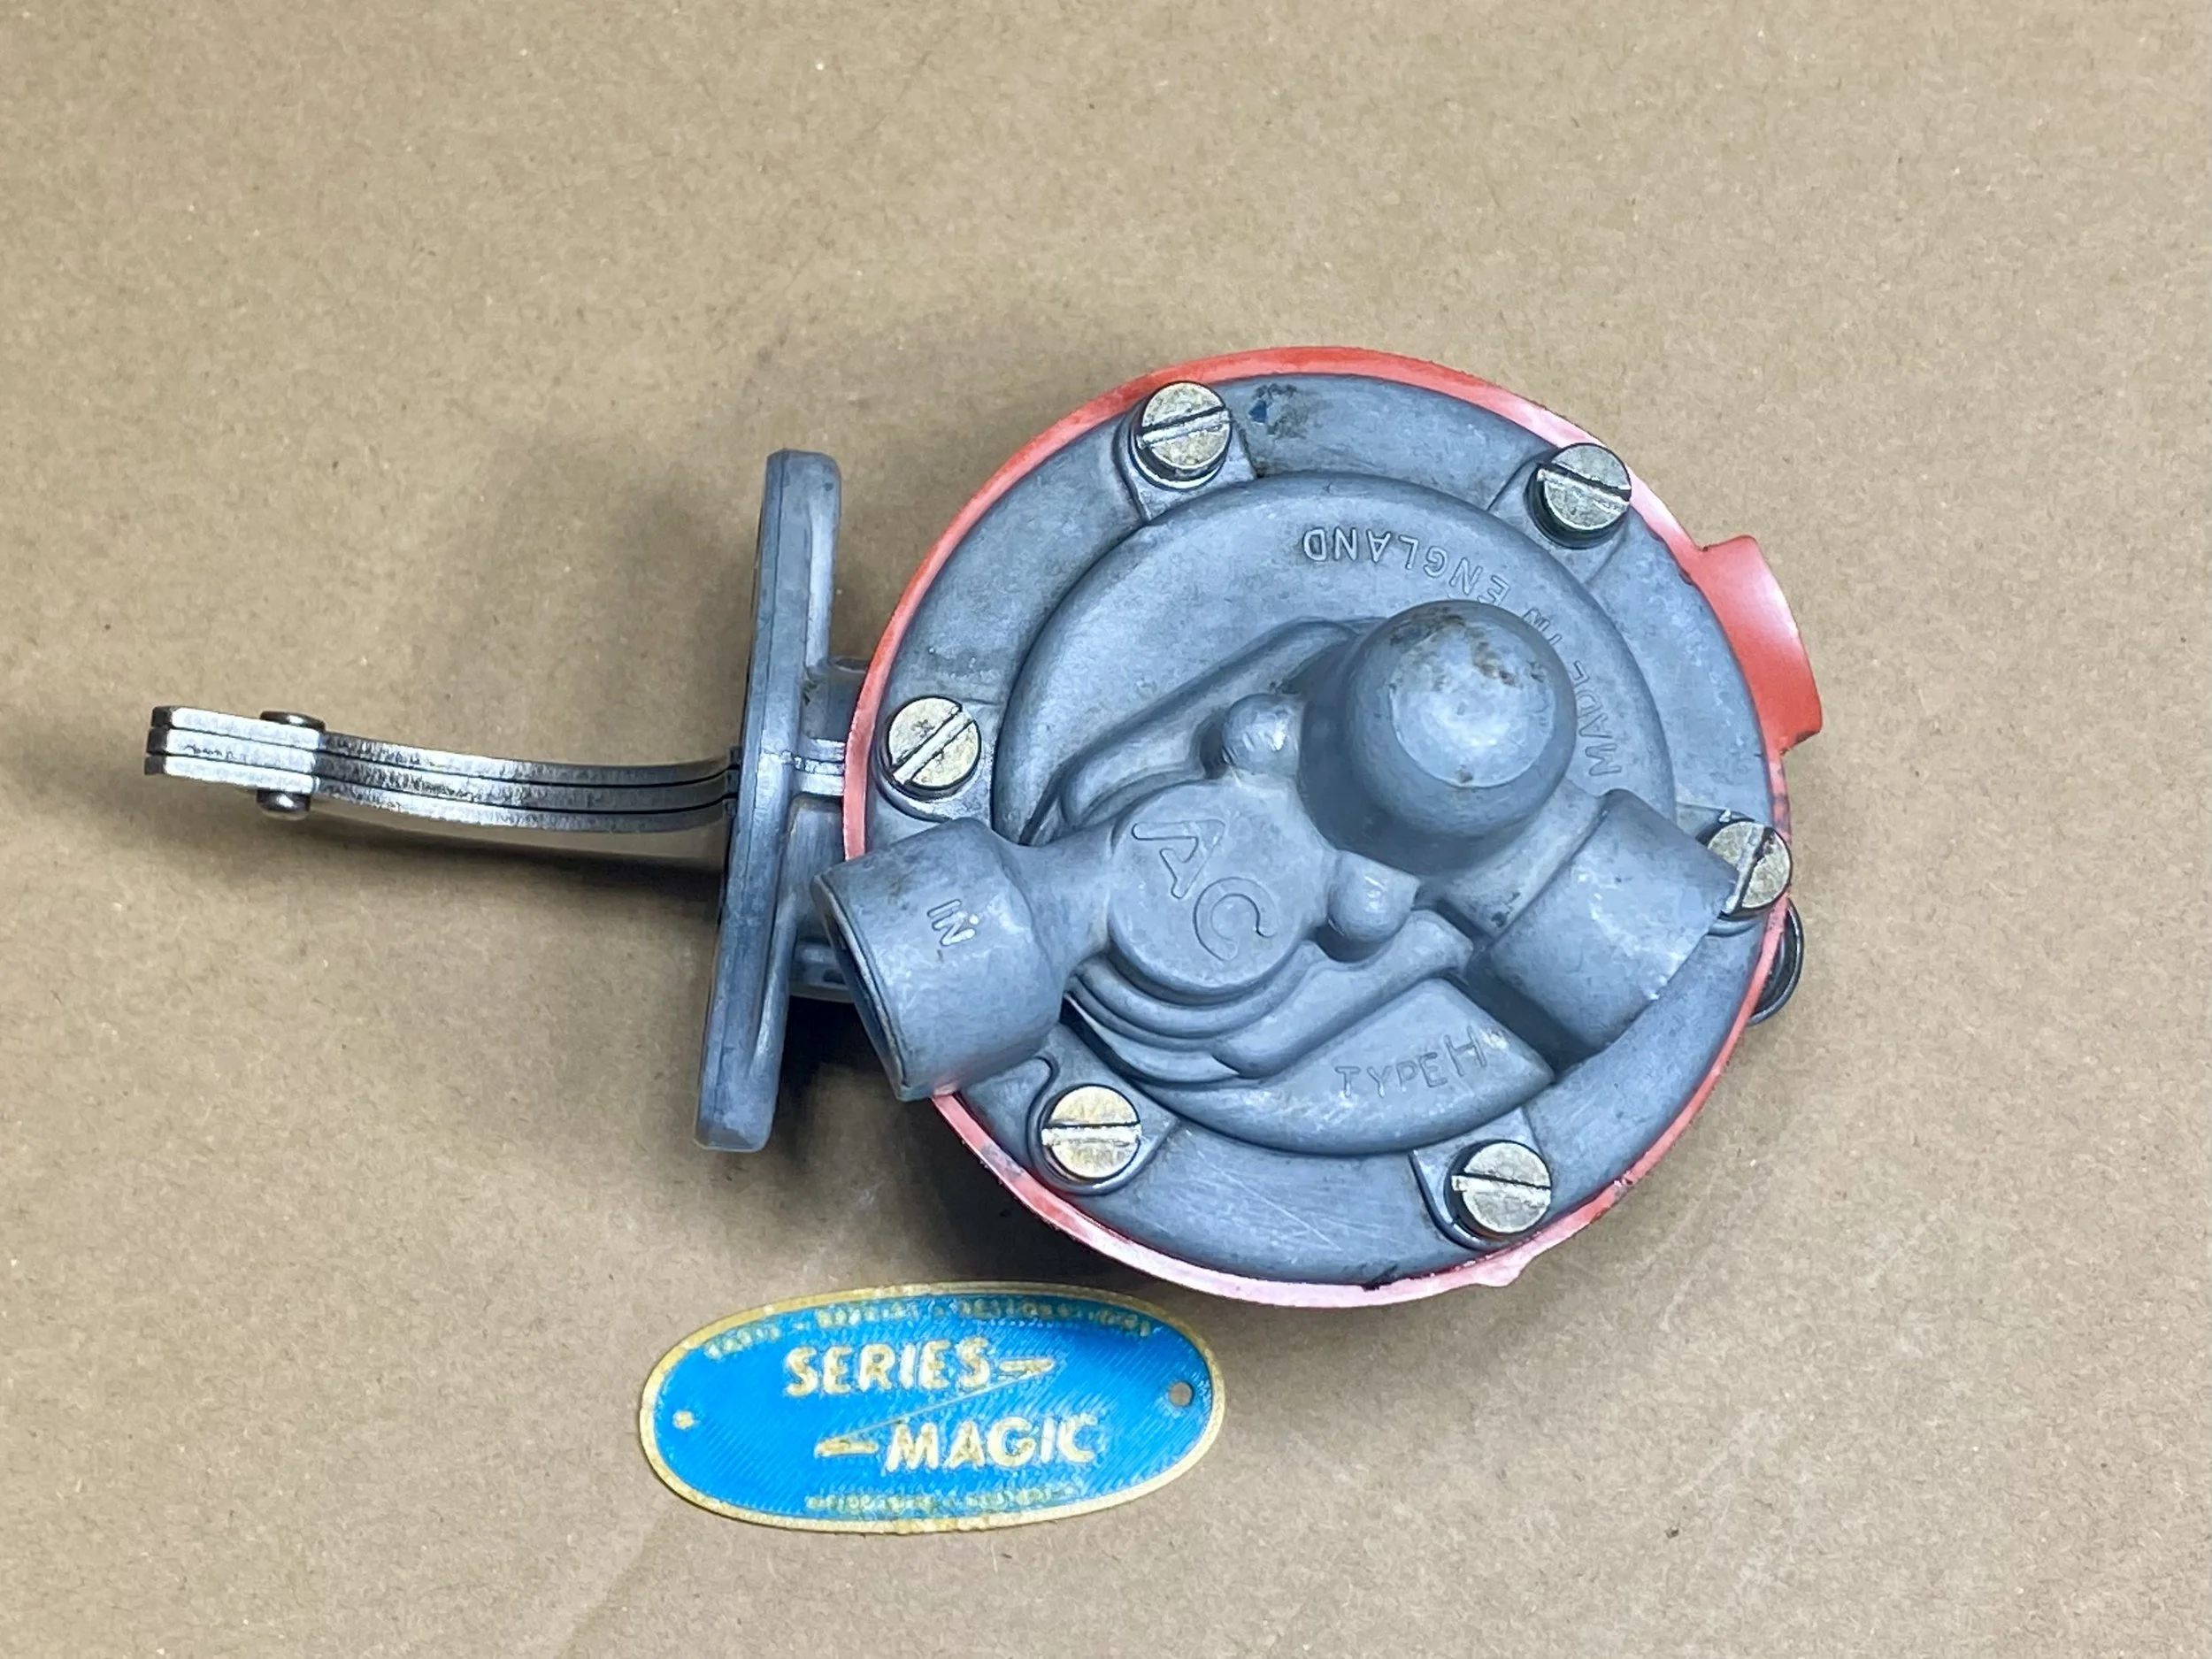
Part number: 563146
The problem
Aftermaket copies of these Series fuel pumps are often poor quality and unreliable, and we've found there's no consistency even within a brand. Common issues are inferior alloy castings, poor quality valves, too much or too little fuel pressure, and engine oil leakage from the hand priming lever hinge (which is not a servicable part). If the hinge leaks, it drips oil onto the front drive shaft—which spatters oil all over the engine bay. Assembly errors are also common.
The Series Magic solution
We source and disassemble used Genuine fuel pumps and reject any castings with defects. We select a set of good-condition upper and lower castings and clean them internally and externally, removing any oxidised alloy deposits but preserving some of the external patina. We then reassemble them with quality replacement parts (hard to find!), test them for leakage, and pressure test them using a purpose-build test apparatus. We back our restored fuel pumps with a one year warranty.
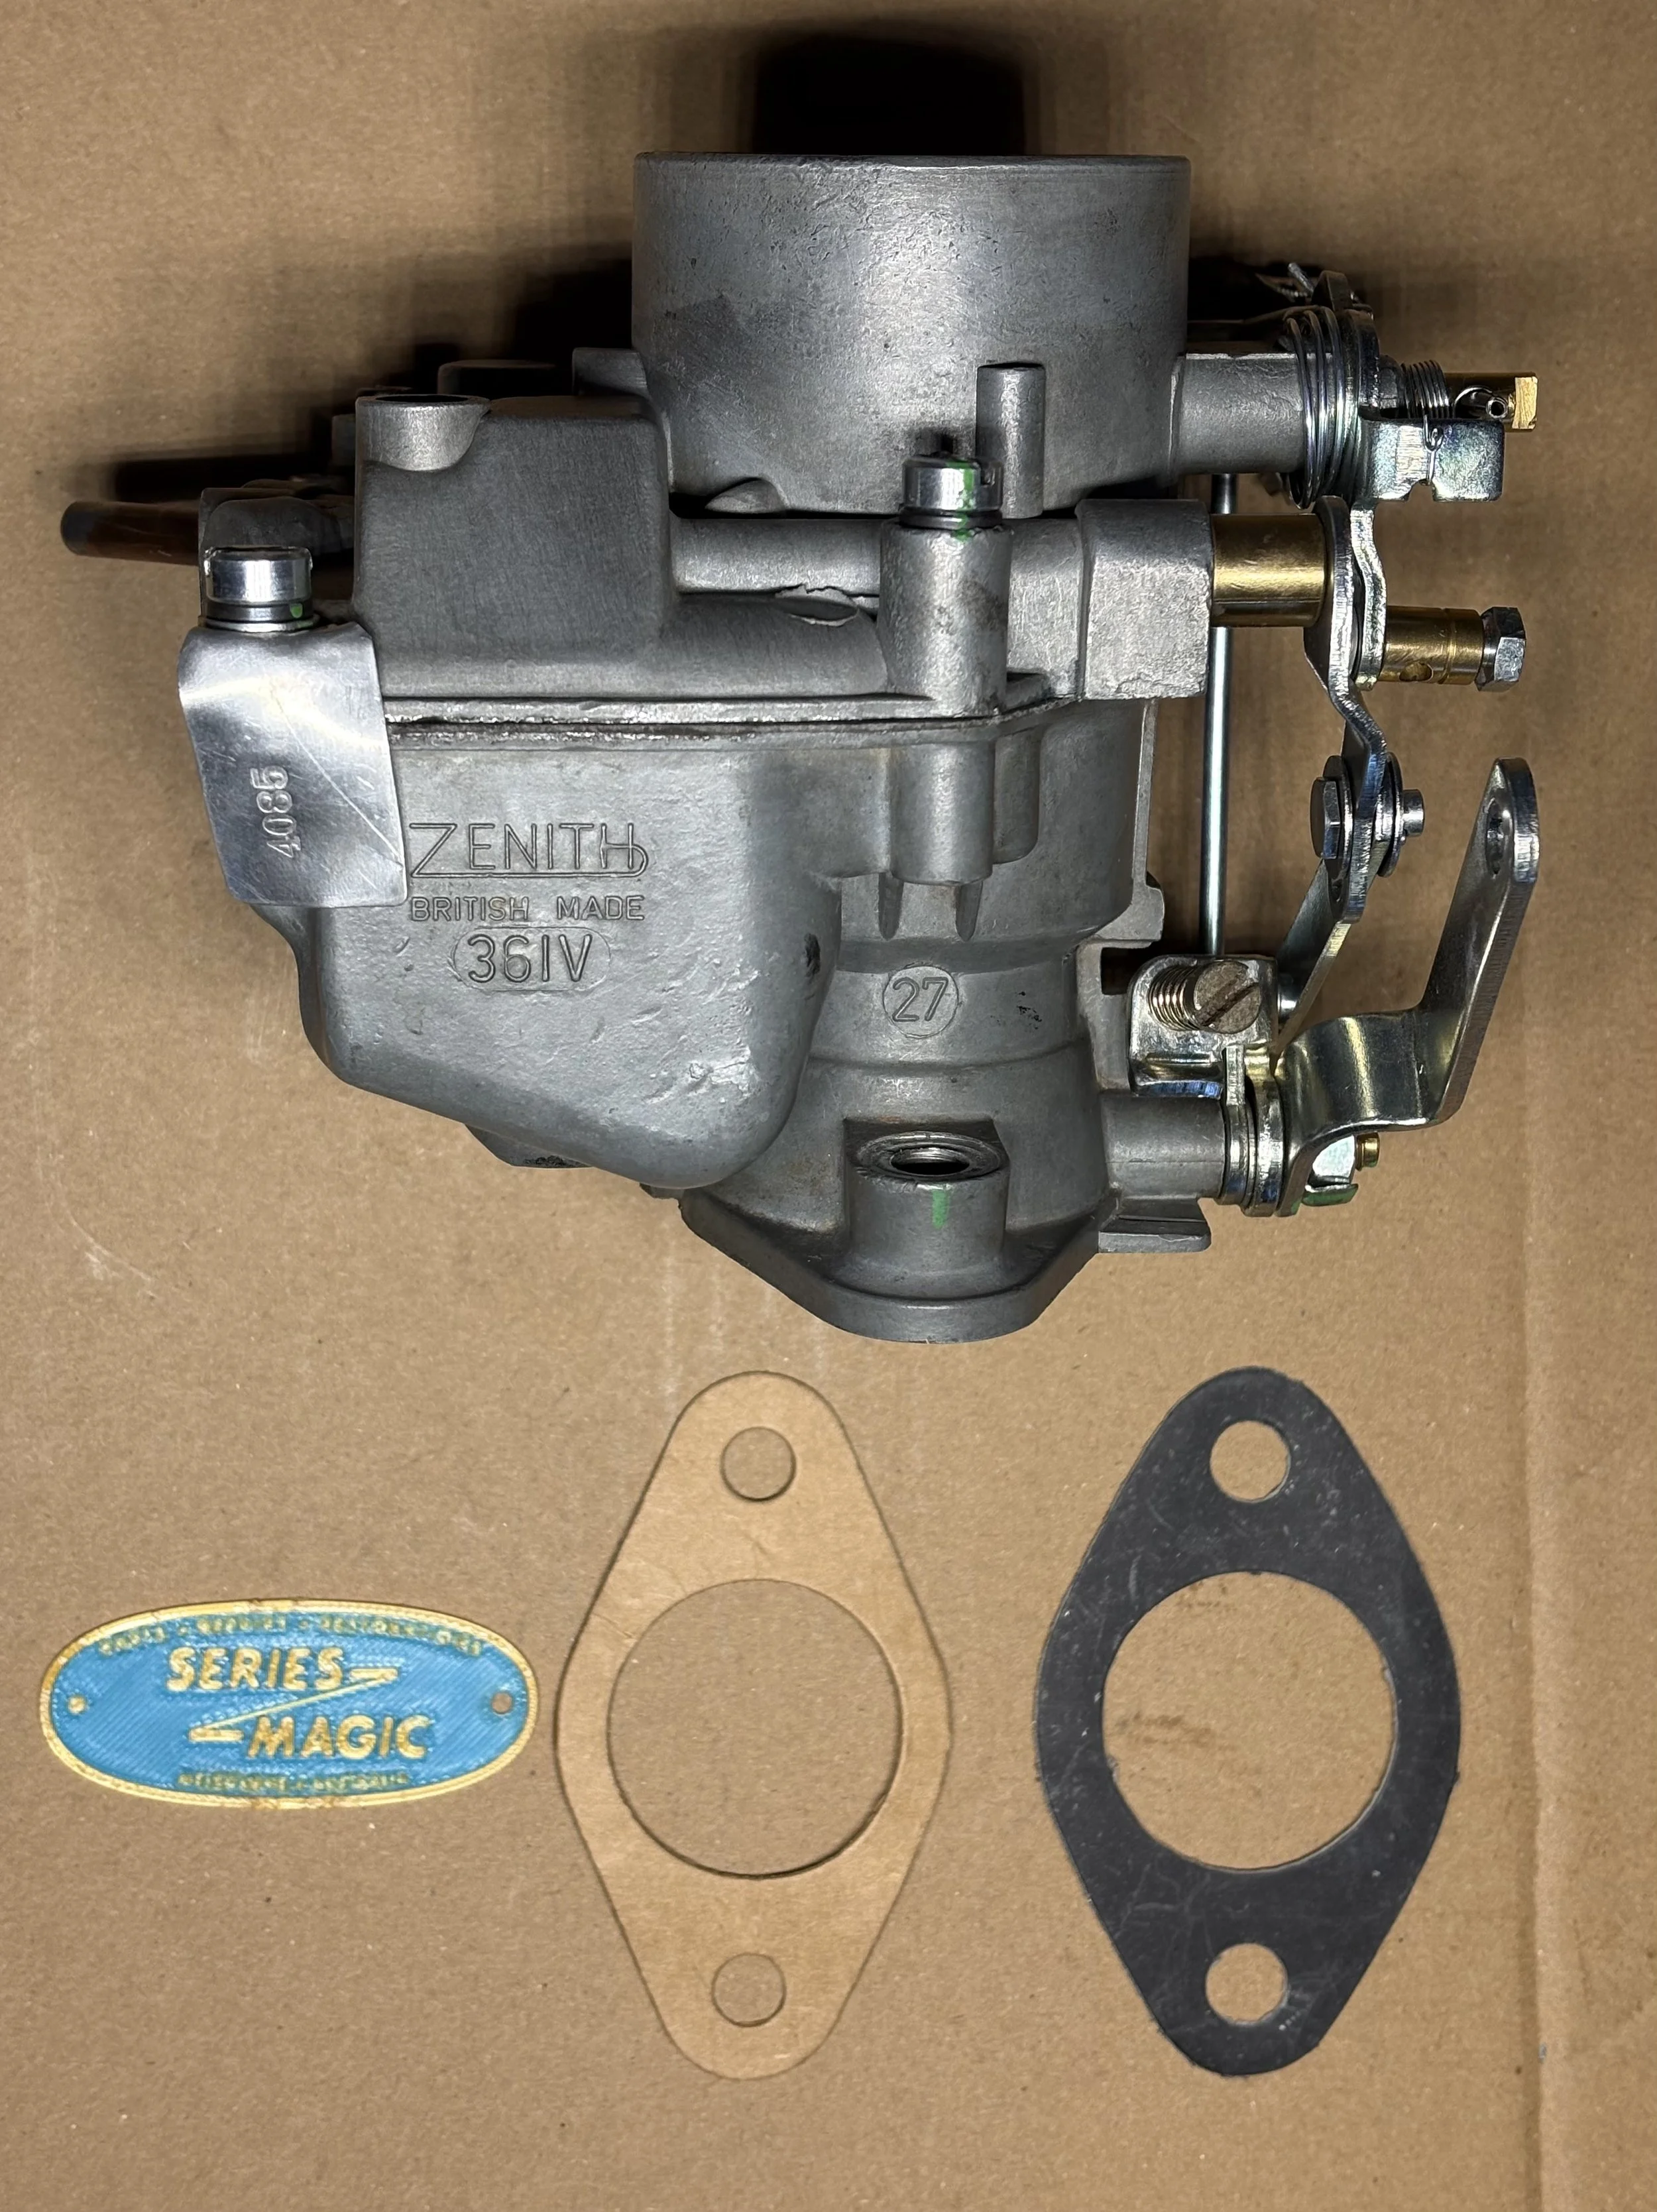
Part numbers: ERC2886 554149
A restored Genuine Zenith carburettor, reassembled with quality replacement parts as required, installed in selected good-condition used Genuine upper and lower alloy castings, cleaned internally and externally yet preserving a hint of the aged-alloy patina. Each carburettor is road tested by us prior to shipment.
The problem
Rebuilding and restoring Genuine Zenith 361V or 36IV carburettors is not as straightforward as buying a rebuild kit and replacing a few parts. Sometimes, aged alloy castings are compromised by decades of heat cycles, deposits of oxidised alloy in internal cavities and drillings, and mechanical wear. The quality of the replacement parts in both Genuine and aftermarket rebuild kits is variable, so parts from different kits, and from elsewhere, must be selectively combined for best results. It's tricky to get right. Carburettor specialists who don't routinely work on these particular carburettors can get it wrong, and they don't typically road test them for you. We do.
The Series Magic solution
Restored Genuine Zenith carburettors, incorporating our Zenith-specific R&D and workshop expertise. Each carburettor is road tested prior to shipment and backed with a one year Series Magic warranty.
The details
We've done a lot of in-house R&D on these particular Zenith carburettors to address design limitations, problems caused by aged castings, the variable quality of replacement parts, the effects of modern fuel additives on reliability, and how to remove decades of grime, oxide, varnish and particulates without completely erasing the aged appearance of the alloy castings.
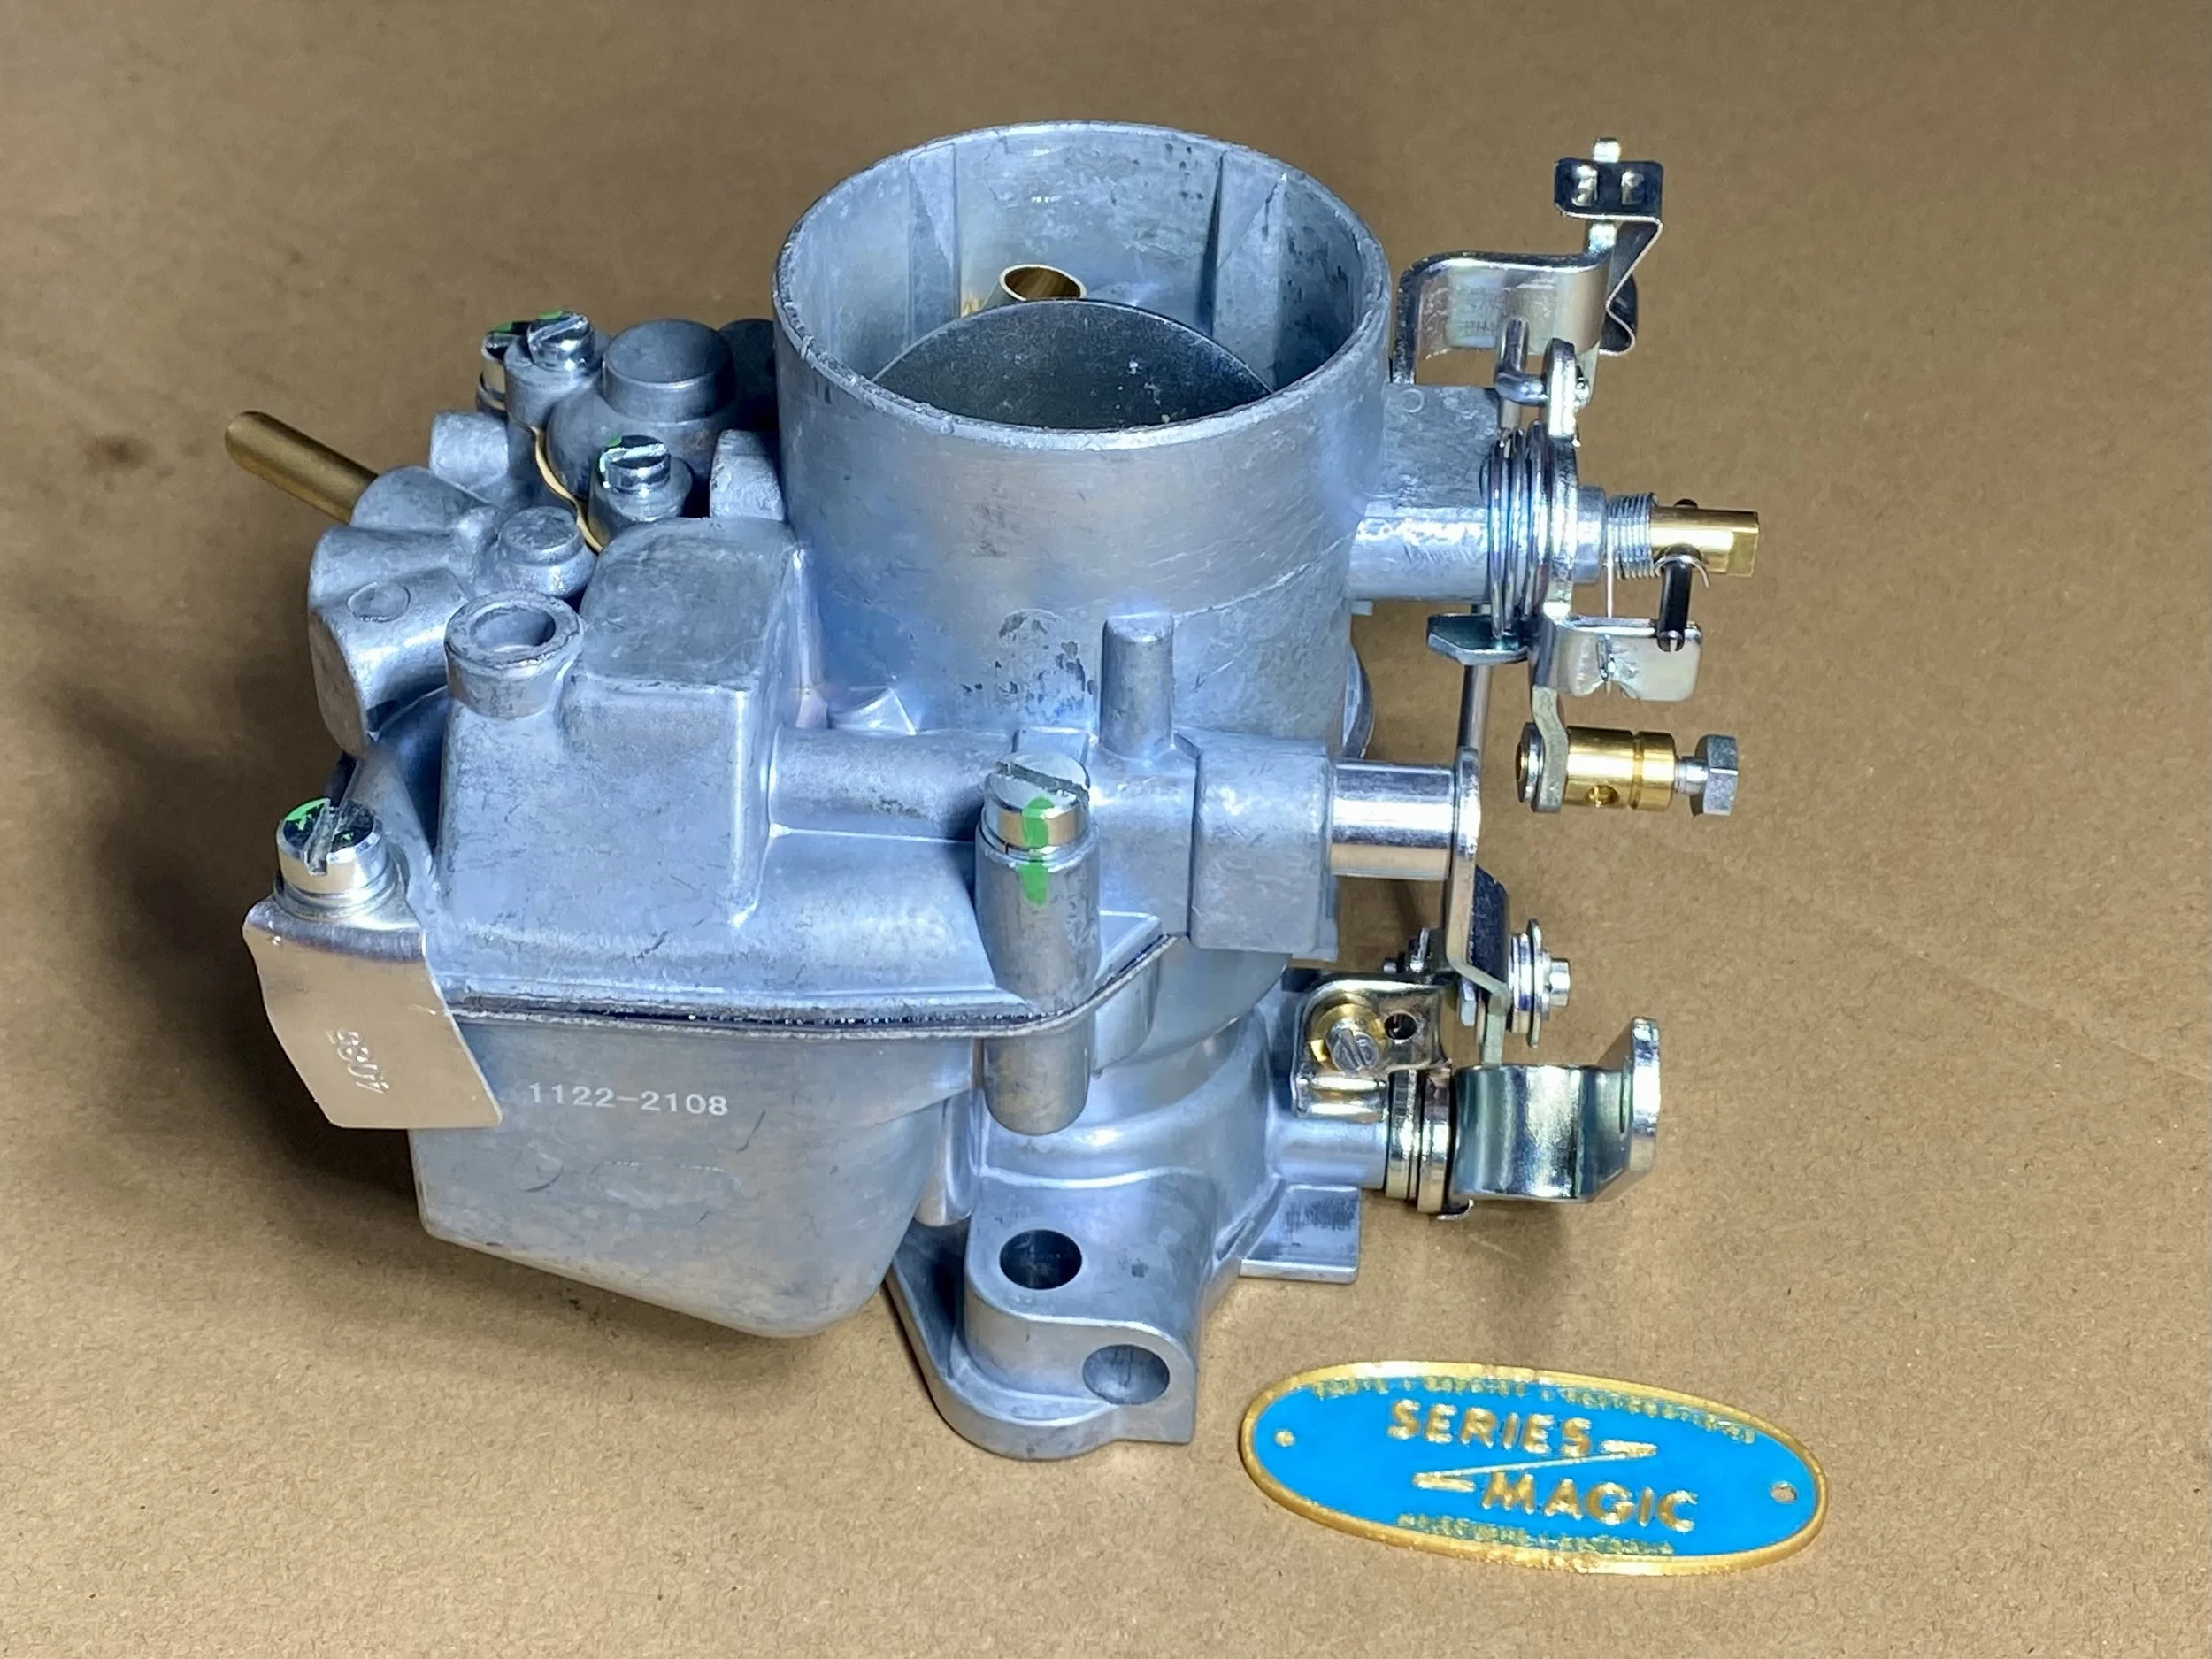
Part numbers: ERC2886 554149
Disassembled, inspected, modified, and reassembled at our workshop.
Then road tested on our workshop Series.
The problem
Aftermarket copies of the Zenith 361V or 36IV carburettors are notoriously unreliable, thanks to casting defects, poor quality parts and assembly errors. Quality varies widely across different suppliers and manufacturers, and between different carburettors in the same manufacturing batch. Few work properly and reliably without modification.
The Weber 34ICH carburettor is more reliable out of the box. It’s marketed as a Series carburettor and it's a workable solution, but not ideal. Unlike the Zenith, which was specified by Land Rover and is very well matched to the 2.25 engine, the Weber is a generic carburettor that happens to work acceptably on a Series. A good Zenith in good tune is better. The difference is not night and day, but it's real and pleasant.
Our solution
We source the aftermarket Zenith copies with the highest quality alloy castings. We disassemble them, modify them and turn them into carburettors that are as good as our restored Genuine Zeniths. We then road test each carburettor before shipping it. We back it with a one-year Series Magic warranty.
The details
The best Zenith copies have excellent castings, but their assembly surfaces need to be lapped flat (as the CNC head passes over them at the factory, it releases stresses in the castings, which cause them to distort slightly). We replace the nitrile float bowl O-ring with one that's more resistant to the additives in modern fuels, which are a common cause of Zenith deterioration. We bench test numerous components, replace any faulty or substandard ones, and rectify any assembly errors. We then road test it on our workshop Series.
Part number: RTC3510
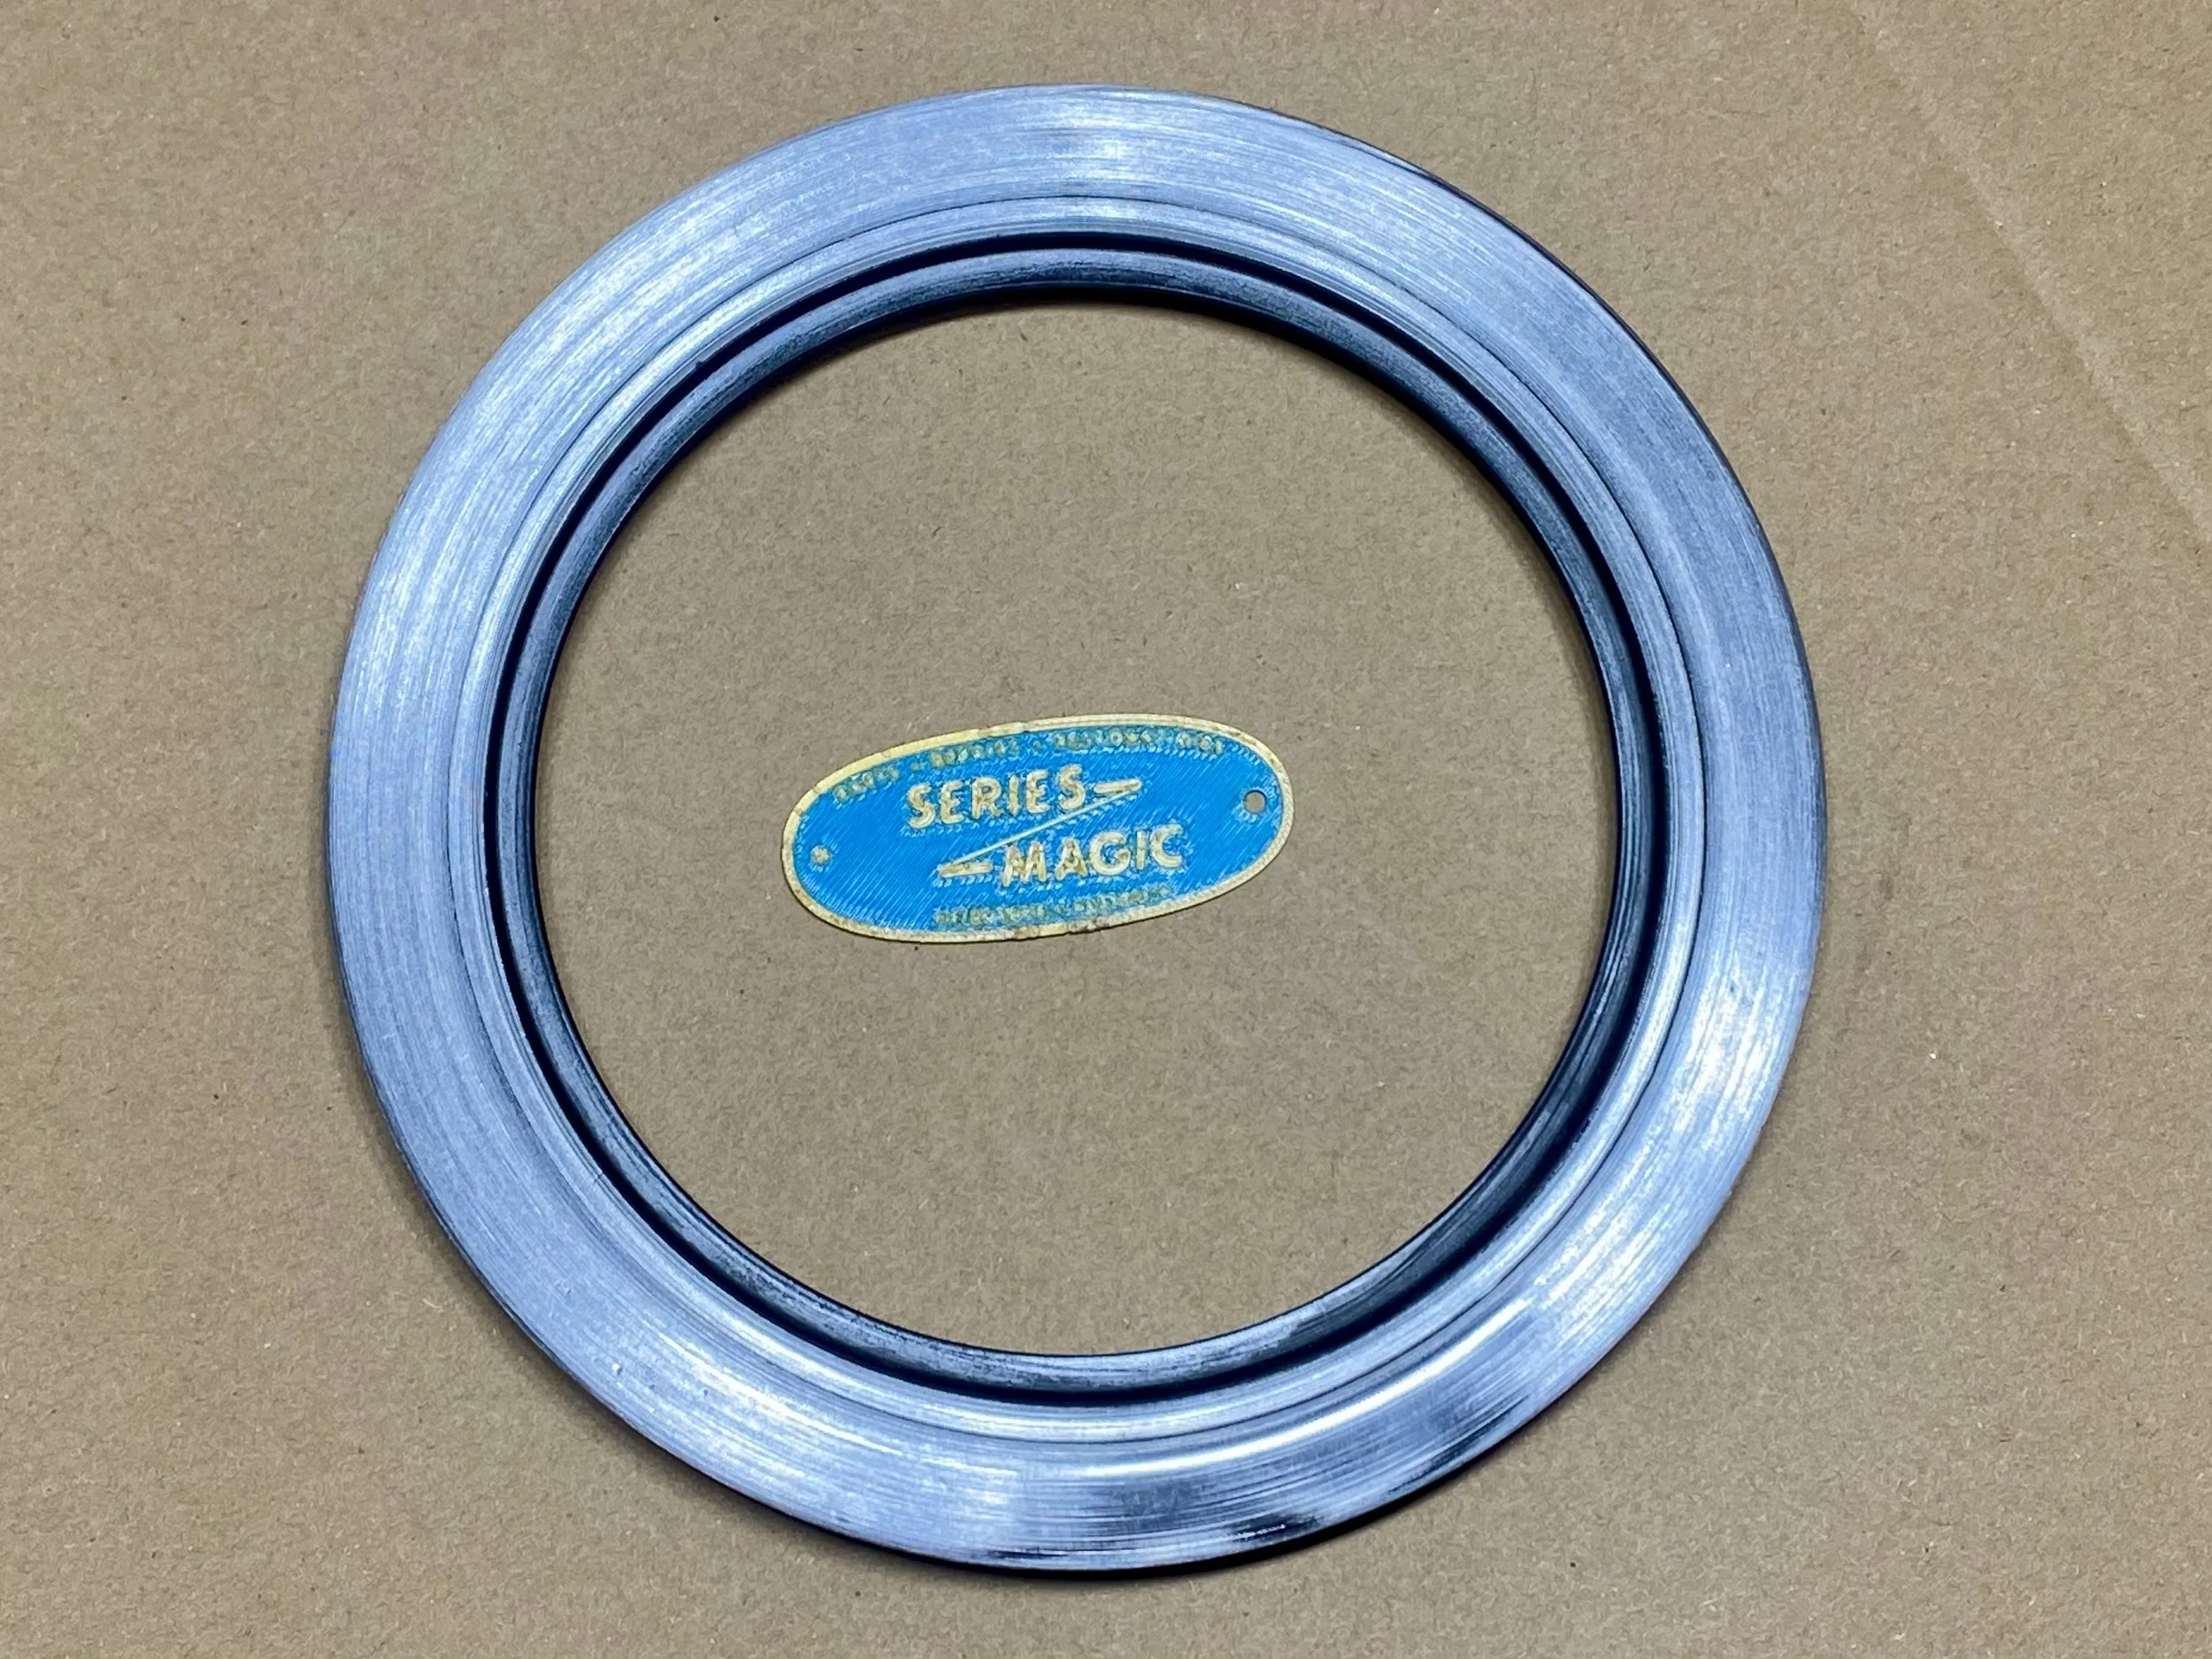
A high quality swivel hub oil seal
Price is for one seal.
The problem
We’ve found that most Series swivel seals (including the ones labelled 'OEM') are badly designed. The seal's inner diameter is slightly too wide to seal properly and reliably, particularly if the spherical surface of the swivel housing isn't in mint condition.
We don’t recommend filling swivel housings with grease to slow leakage past the seals. Gear oil is the lubricant specified by Land Rover for this application, for good reason.
The solution
We’ve found that these particular seals are the only ones that actually work. They can even accommodate shallow rust-pitting of the spherical sealing surface with negligible leakage, provided that any pitted areas that the new seal will sweep over are lightly sanded with extra-fine wet and dry sandpaper to restore surface smoothness.
The details
These are the seals we use in our workshop if we need to detach the swivel hub assembly to overhaul or replace it. If all you need to do is replace the seal, and the spherical swivel housing surface has only shallow rust pitting (see photos here for guidance on this), or no pitting, then you can install one of our split seals, which can be fitted without having to detach the swivel housing assembly from the axle housing.
Part number: RTC3258 (modified by Series Magic)
Price is for one seal.
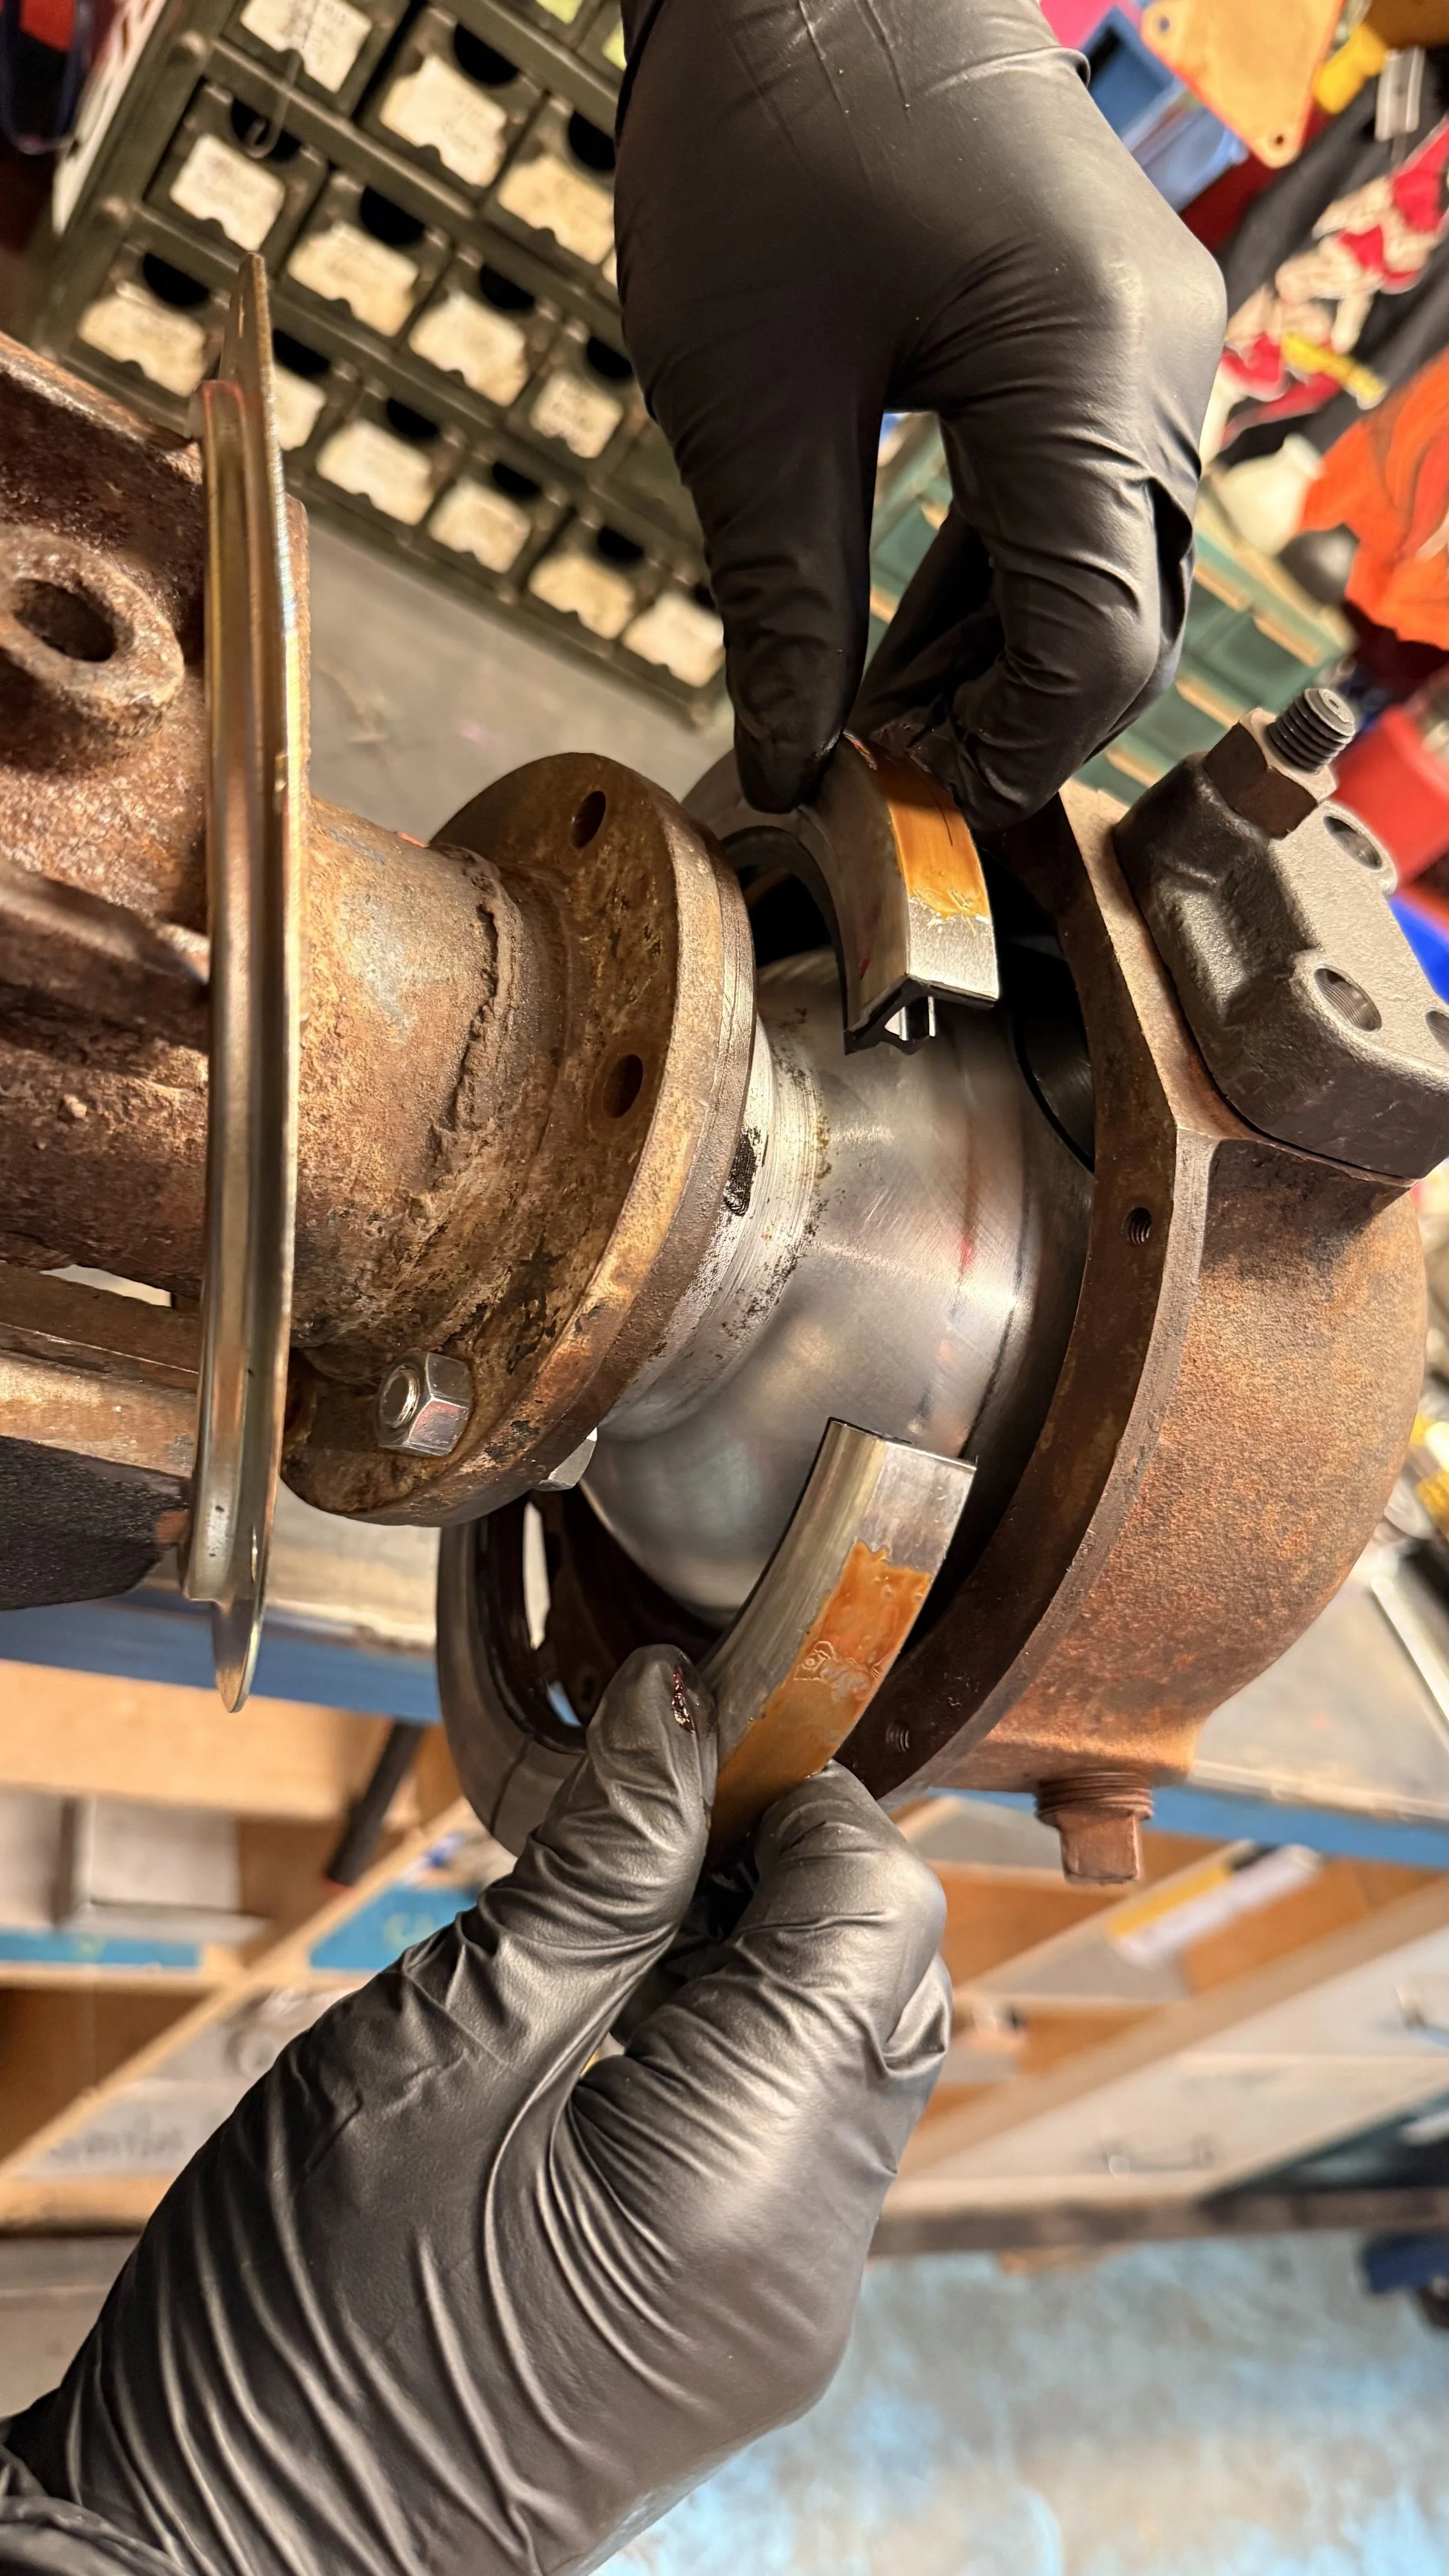
Our RTC3258 split seal is a modified high quality oil seal that can be installed without having to detach the swivel hub assembly.
Our split seal can save you hours of disassembly and reassembly work.
Here’s the illustrated installation guide, which explains when it’s appropriate to use a split seal and when it’s not, depending on the condition of the swivel housing.
If all you need to do is replace the seal, you can use our split seal.
The problem
Replacing the swivel seals on a Series the usual way is a big job—you have to detach the whole swivel hub assembly just to replace a seal.
Newly installed seals typically weep oil immediately, because most new seals are a poor fit on the swivel sphere.
We don’t recommend filling swivel housings with grease to slow leakage past old or poor quality seals. Oil is the lubricant specified by Land Rover, for good reason.
The solution is not grease: it’s seals that actually work and that are easy to install.
Our solution
High quality swivel seals, modified by our workshop for easy installation as a split seal.
These seals are so good they can accommodate shallow rust-pitting of the spherical sealing surface with negligible leakage, provided that any such pitted areas are lightly sanded with ultra-fine wet-and-dry sandpaper to restore surface smoothness.
The details
You can install one of our modified seals without any disassembly.
Cut the old seal to remove it, prepare the spherical surface and the new seal, stretch the split seal over the swivel housing neck, fit the modified seal spring and apply RTV silicone to the split.
We've fitted these split seals in our workshop with excellent results. They don't leak, as long as they're correctly installed and the spherical sealing surface isn't deeply pitted. What you can and can't get away with in terms of pitting is explained in our illustrated installation guide, which you can download here.
The problem
Land Rover Special Tool 605863 is unobtainable
The Series Magic solution
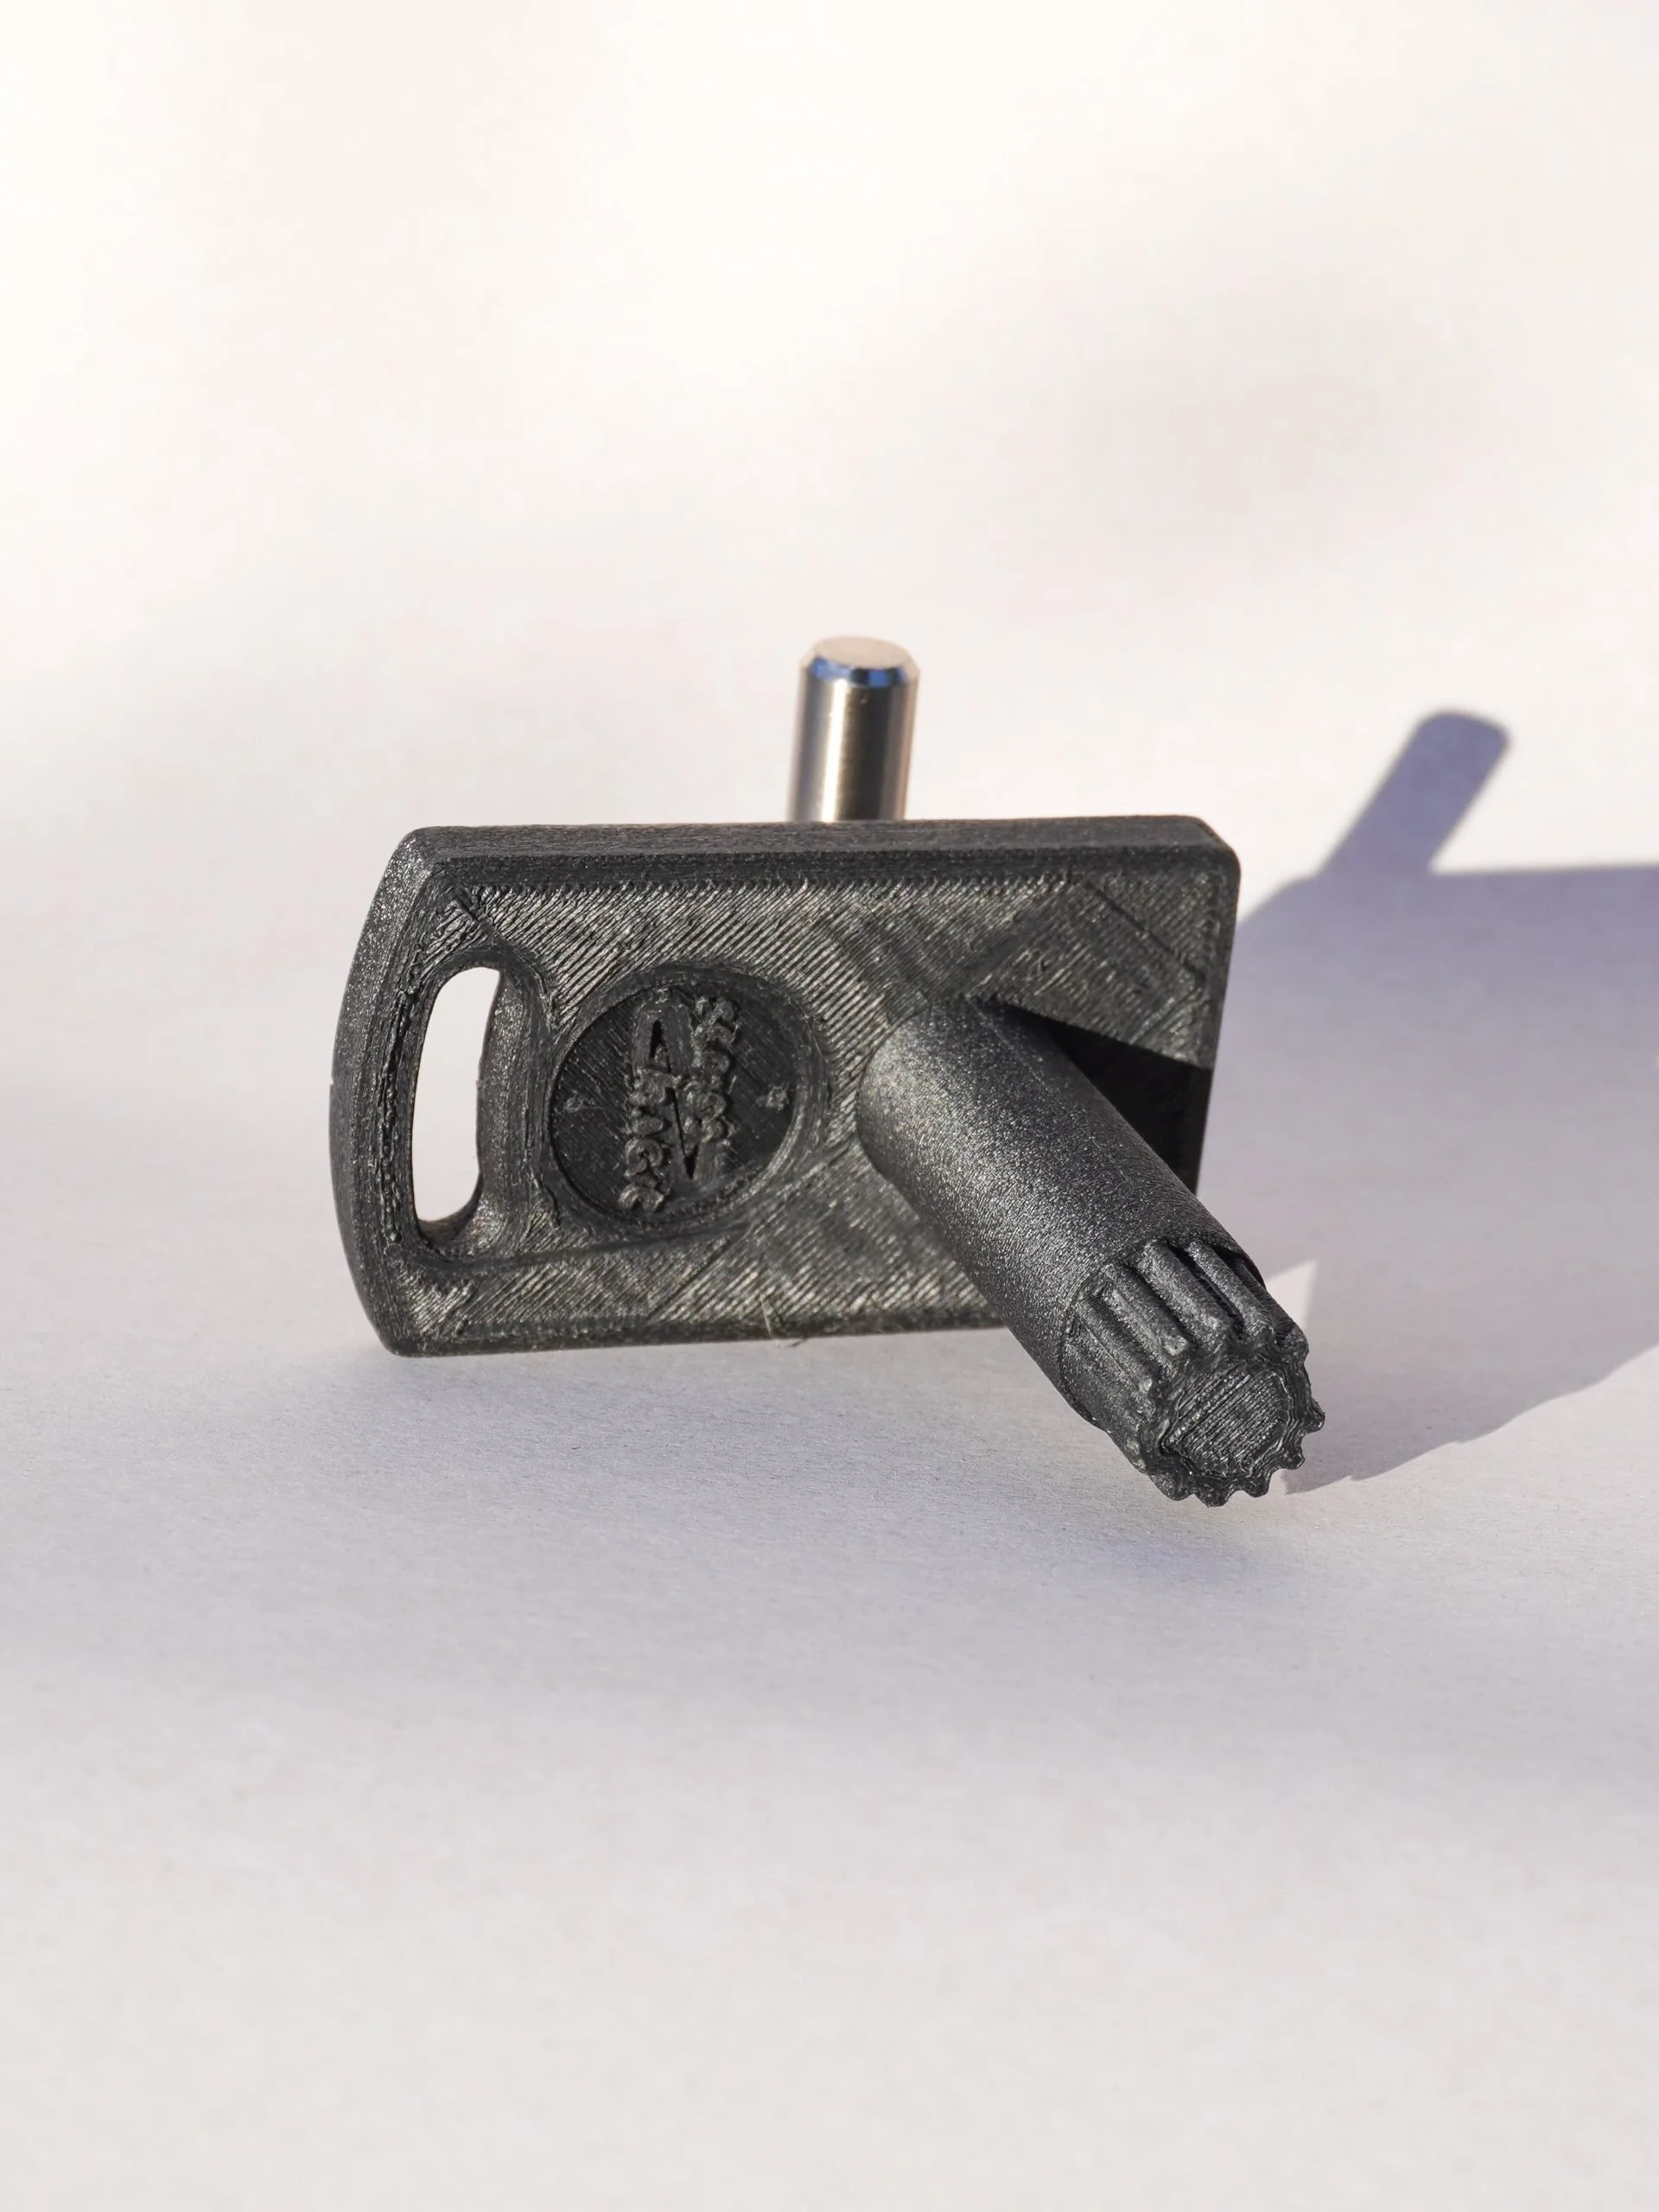
Our diesel timing tool
The details
This is a precision-engineered tool for setting the injector pump timing on a Series 2a or Series 3 2.25 litre 4 cylinder diesel engine. Precise pump timing is critical to the performance of these engines. This tool aids spur gear installation (an improvement on the Land Rover tool) and accurate pump timing.
Designed and manufactured by Series Magic, these multi-use tools are 3D printed from durable polycarbonate reinforced with carbon fibre.
Each tool comes with a set of detailed instructions.
The problem
We’ve found that the widely available Series gearbox and transfer case gaskets have slightly misaligned stud holes and bolt holes (a common problem with aftermarket Series gaskets).
To prevent such gaskets from tearing during installation, you have to take a razor blade and make several radical cuts around each stud hole and bolt hole. This takes at least half an hour, and it doesn’t always work: sometimes the gasket rips at the narrow margins of certain holes, because of the cuts you’ve made.
Our solution
The gearbox and transfer case gasket kits we use and recommend are an excellent fit over the studs and bolts, and the transfer case sump plate gasket is made of cork—like the now-unobtainable Genuine ones—rather than cardboard. A properly-installed cork gasket tends to seal better than a cardboard gasket if the sump plate is distorted (as they often are, by overtightening of the fixings).
Installation tips
For best results with cork gaskets, apply a thin smear of a non-hardening gasket dressing, such as Permatex Aviation Form-A-Gasket 80019, to the underside of the sump plate and the corresponding gasket face.
Be sparing: if you apply too much dressing, you’ll lubricate the gasket rather than make it adhere, and the gasket will tend to distort and squeeze out as you tighten the fixings. The transfer case side of the gasket should be installed either dry or with a very thin film of gasket dressing applied to the transfer case.
Don’t overtighten the fixings: Cork gaskets work best when they remain a bit spongy rather than being squeezed flat. After the first few heat cycles the gasket will have settled, and you may need to tighten the fixings a little bit more; but don’t overdo it.